
DeepChat - Commercial-Friendly Full-Featured AI Agent Client
DeepChat guide — connect this open-source, commercial-friendly full-featured AI Agent client to 88API and import DeepChat configuration with DeepLink in one click.
DeepChat is an open-source, cross-platform, commercial-friendly full-featured AI Agent client. It supports cloud and local models, MCP tool calls, Skills, ACP, Agent integration, and remote-control workflows, making it suitable for users who need unified Provider management and advanced AI Agents.
- Official Website: https://deepchat.thinkinai.xyz
- GitHub Repository: https://github.com/ThinkInAIXYZ/deepchat
- Download Address: https://deepchat.thinkinai.xyz/#/download
88API Integration Method
Method 1: One-Click Import
-
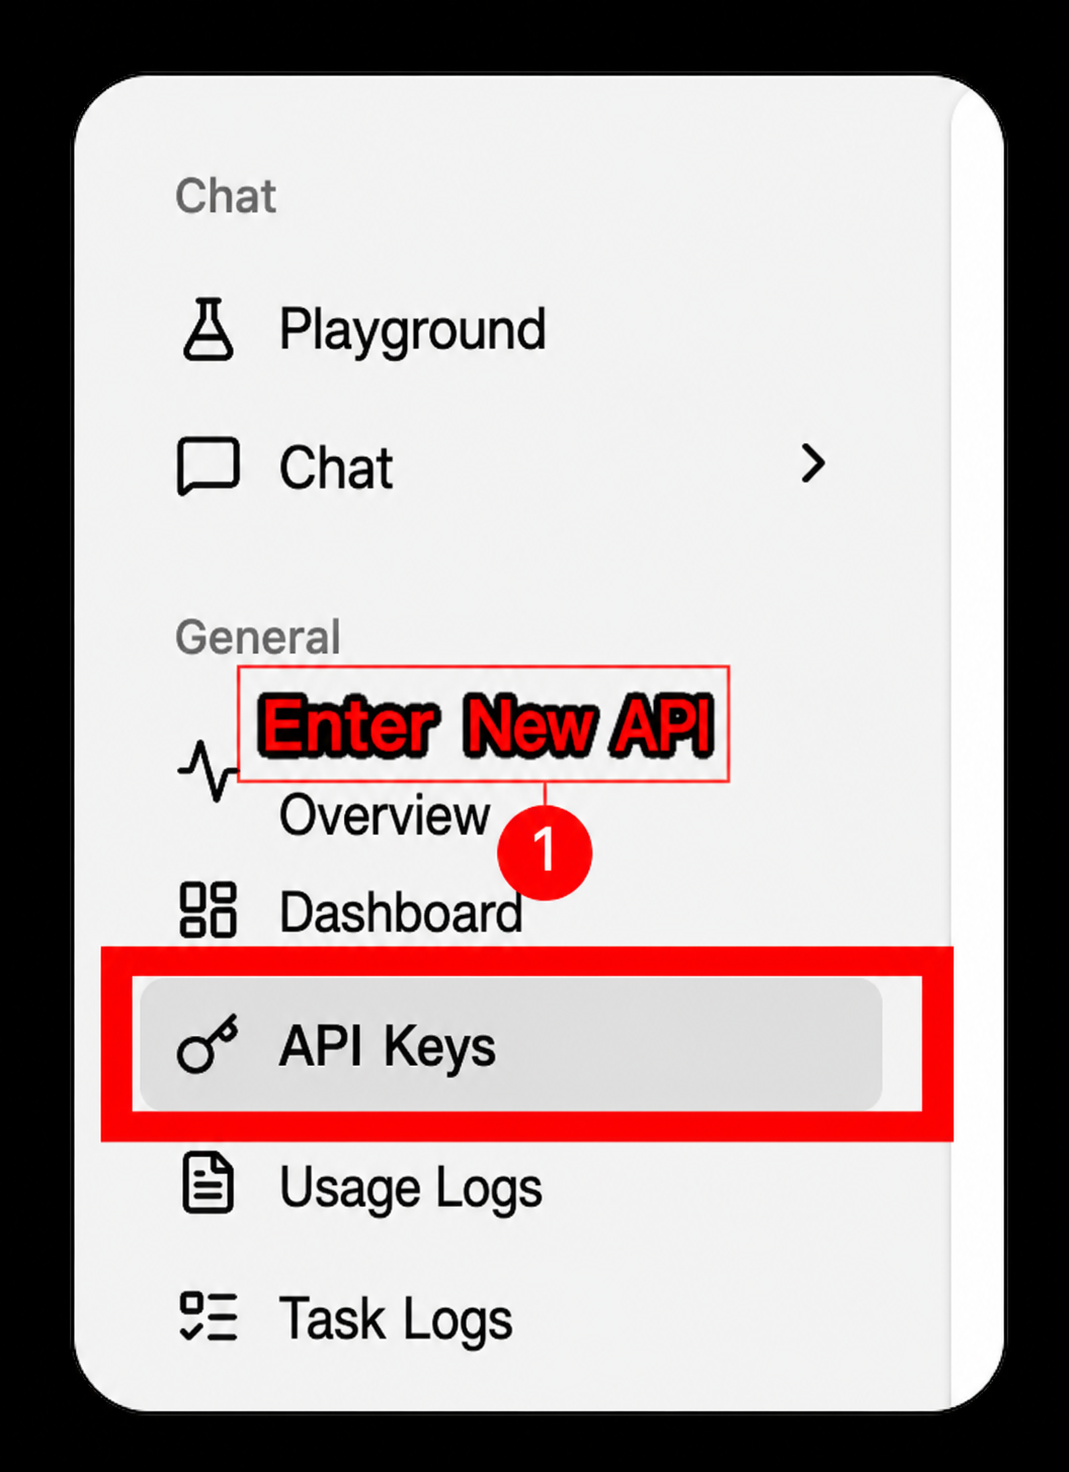
In the 88API console sidebar, open API Keys and find the key you want to use
-
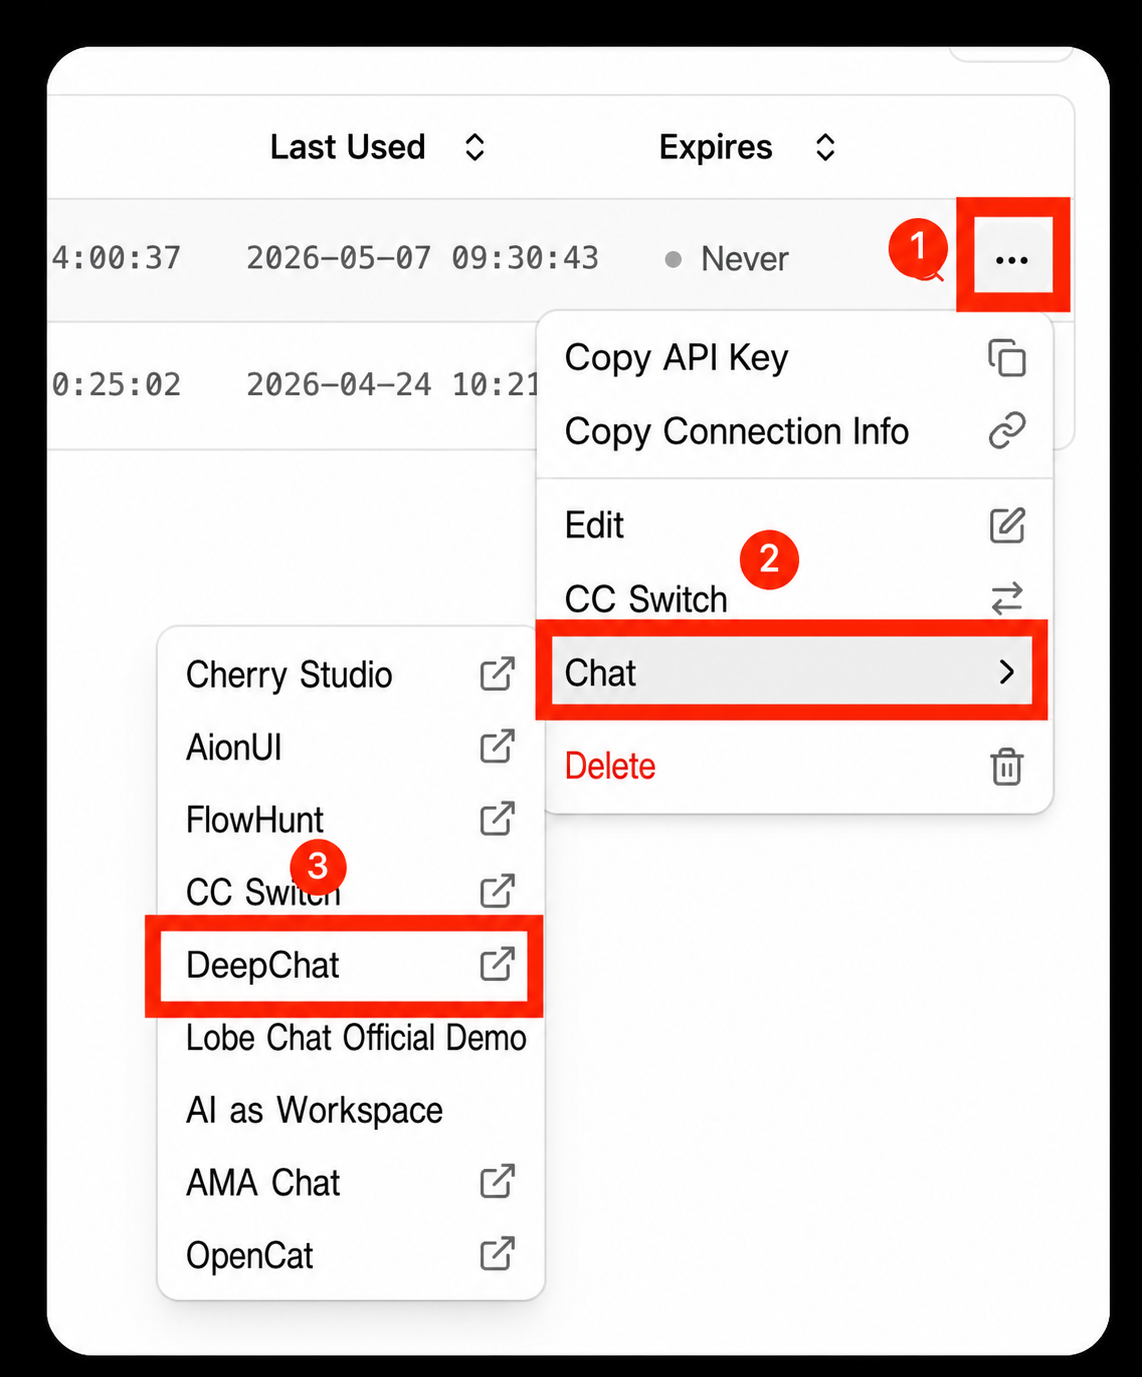
Click the … button on the right of that key and choose Chat → DeepChat
-
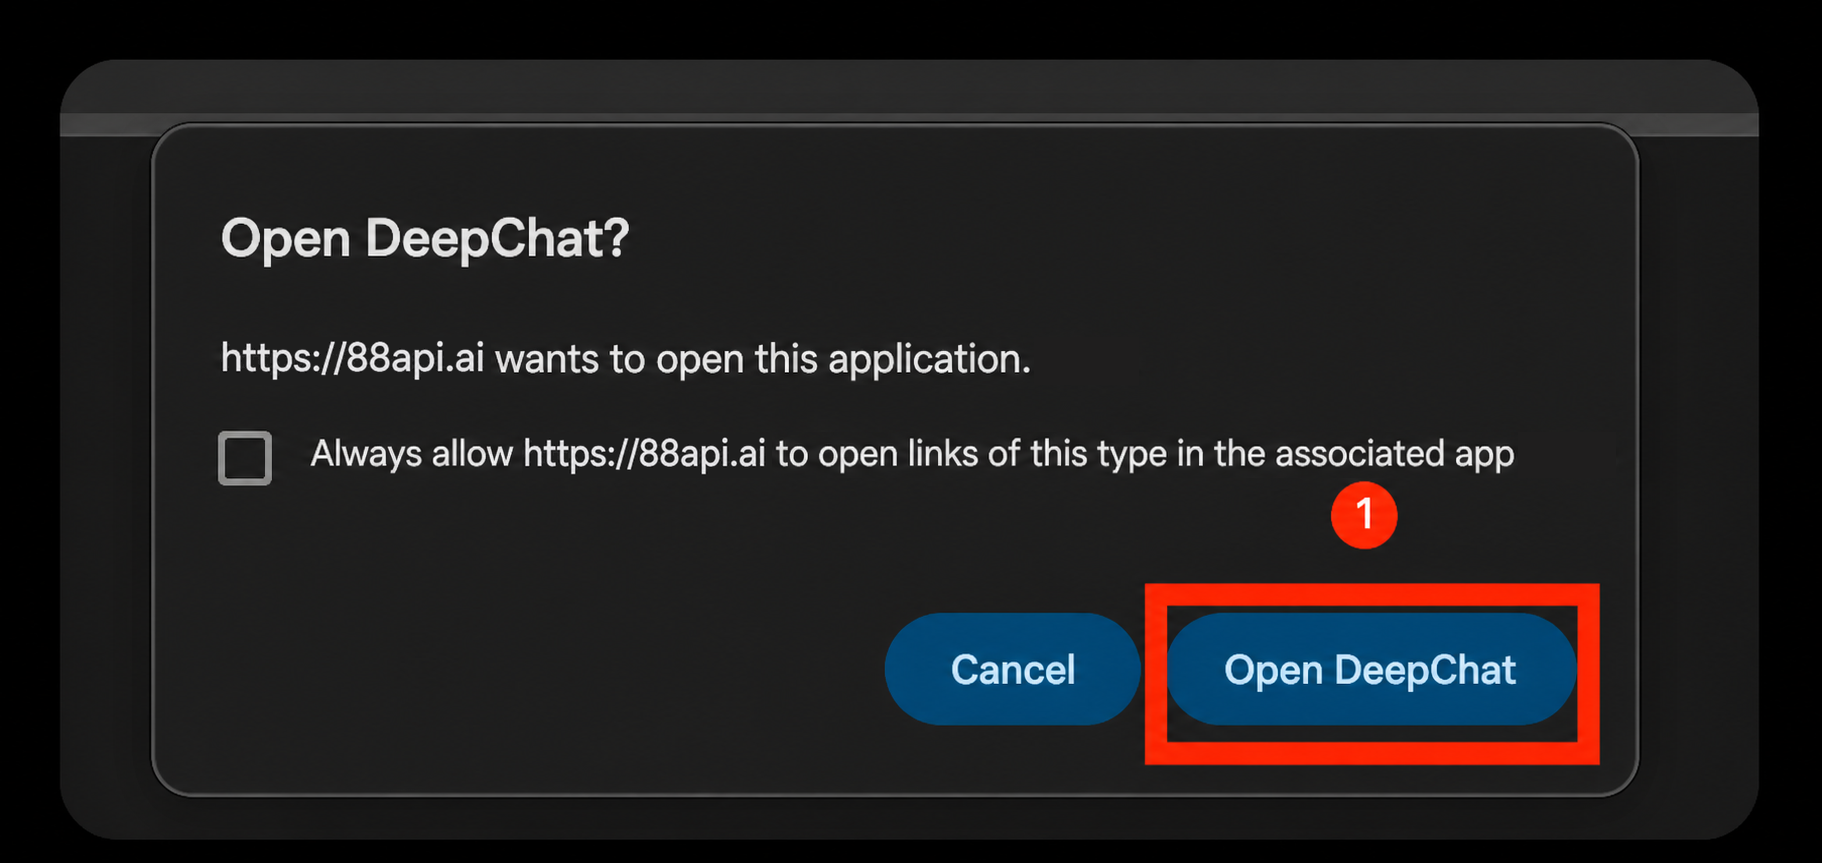
Let the browser launch DeepChat and confirm opening the app
-
DeepChat shows the Import Provider preview: the name is
new-api(the built-in New API provider) and the address ishttps://88api.ai. Check it, then click Confirm. The console's one-click import fills in the 88API site addresshttps://88api.ai; it reaches the same service as the API addresshttps://api.88api.aiused in Method 2, so both work and you don't need to change it after importing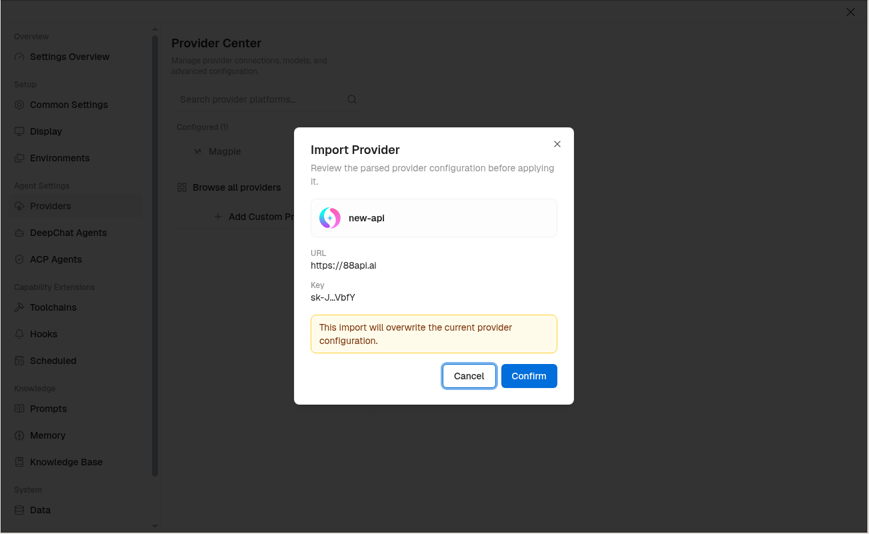
-
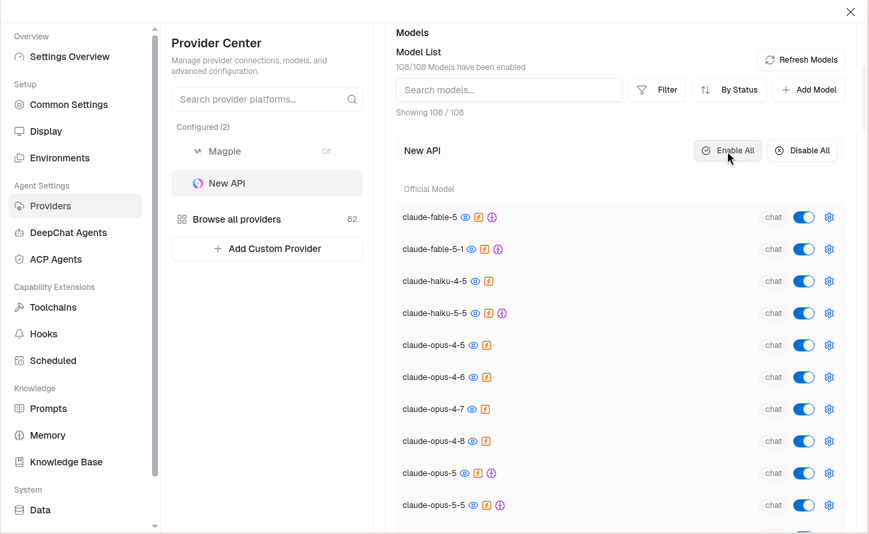
Go to Settings → Providers → New API, click Refresh Models, then click Enable All (or turn on only the models you need)
-
Start a new chat, pick a model under New API below the input box, and send a message
Method 2: Manual Configuration
-
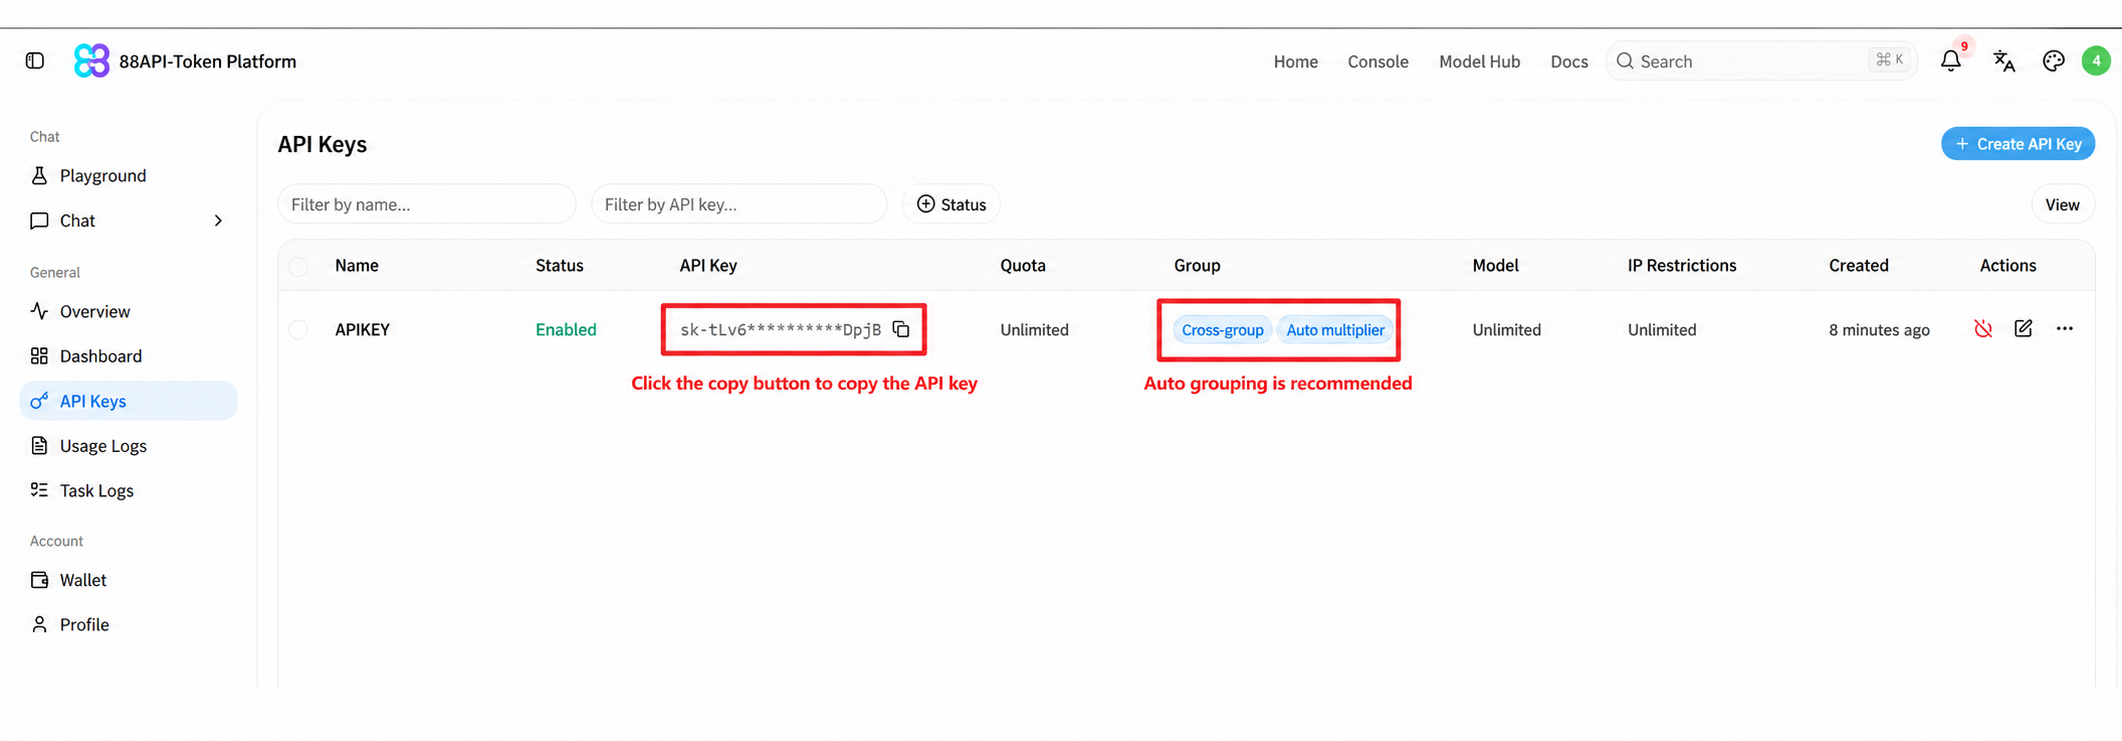
Copy your API Key on the API Keys page of the 88API console
-
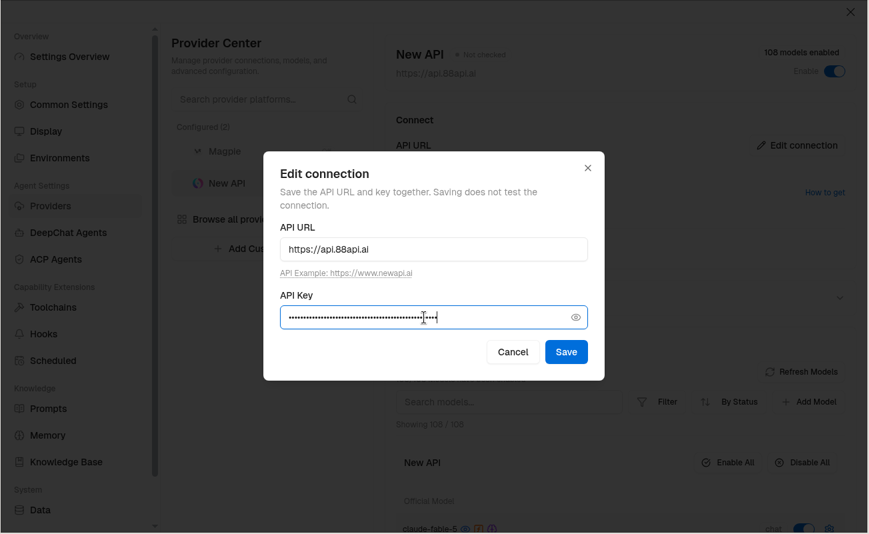
In DeepChat, open Settings → Providers, find the built-in New API provider in the list (do not use Add Custom Provider), and click Edit connection:
- API URL:
https://api.88api.ai(the New API provider appends/v1automatically;https://api.88api.ai/v1also works) - API Key: paste your 88API API Key
- Click Save
- API URL:
-
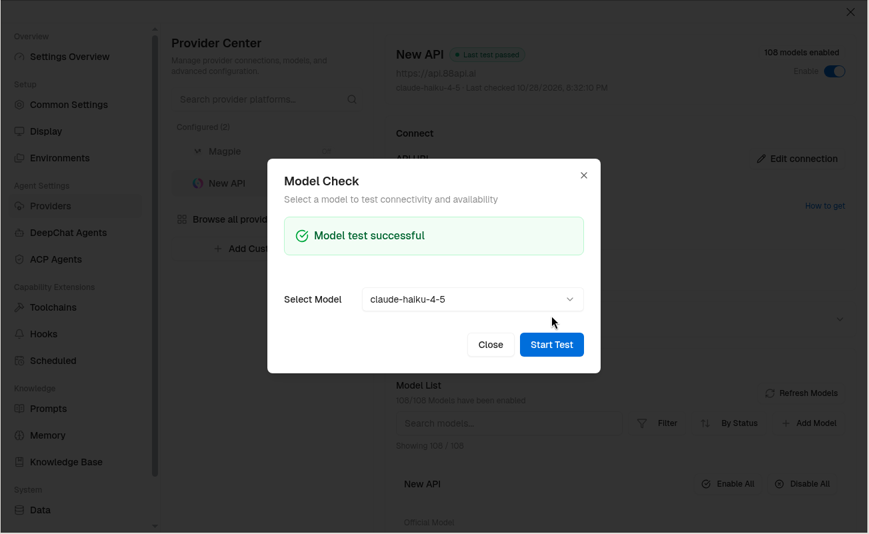
Click Test connection, choose a model and click Start Test. "Model test successful" means the configuration is correct
-
Turn on the Enable switch of New API, click Refresh Models → Enable All, then select the models in a chat
If you must use Add Custom Provider: choose the API type "OpenAI Completions" and set the API address to
https://api.88api.ai/v1(requests fail without/v1)
Image Recognition
Chat models on 88API that accept image input (for example deepseek-v4.1-flash, deepseek-v4-flash and the Claude models) can answer questions about images in DeepChat.
DeepChat only treats models with an eye icon next to their name in the model list as vision models. A model without the icon is not handled as a vision model, even if it supports image input.
- Find the model in Providers → New API. If there is no eye icon next to its name (for example
deepseek-v4.1-flash), click the gear icon on the right of the model, turn on Visual ability, then click Save configuration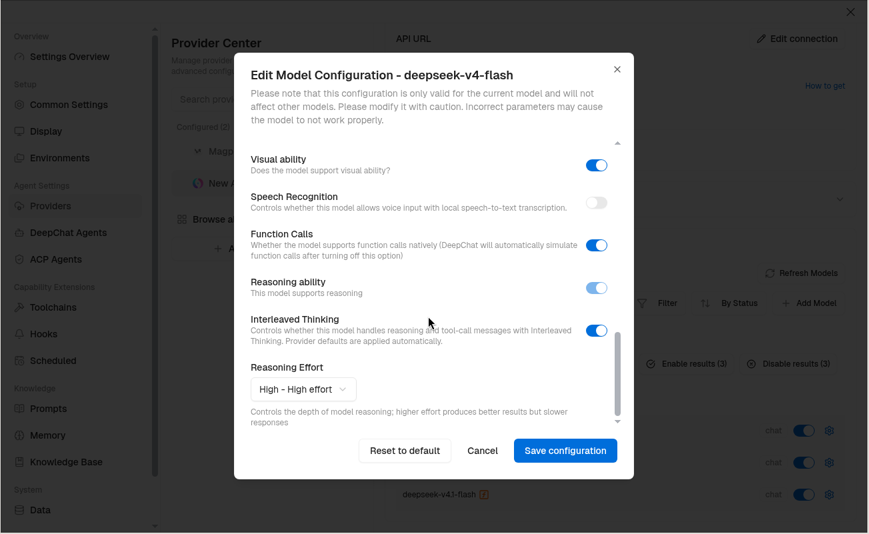
- Start a new chat with that model, click + at the bottom-left of the input box to upload an image, and ask your question
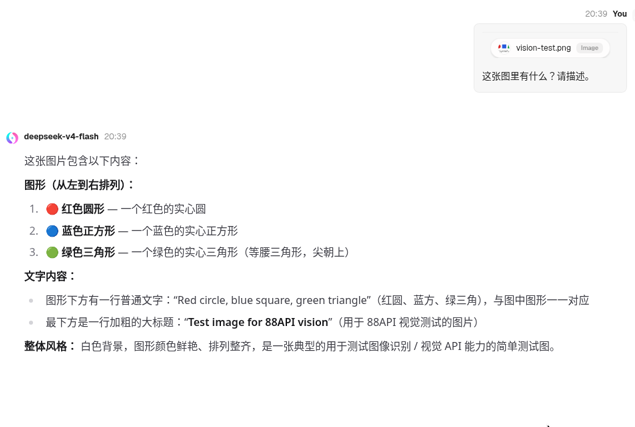
Only turn on Visual ability for models that really accept images; sending an image to a text-only model makes the request fail.
FAQ
Test connection fails or shows Unauthorized
Copy the API Key from the 88API console again and make sure there are no spaces or line breaks around it. Check that the key is not disabled and that your account has balance.
The model list is empty
Make sure the API URL is https://api.88api.ai, then click Refresh Models. If you use Add Custom Provider, the address must end with /v1.
I sent an image but the model says it can't see it
Follow the Image Recognition section above to turn on Visual ability for that model, save, then start a new chat and try again.
Where can I see usage?
The Usage Logs page of the 88API console lists every request DeepChat sends, so you can check the model and cost.