
Claude Code


Project Introduction
Unleash Claude's raw power directly in your terminal. Search million-line codebases instantly. Turn hours-long workflows into a single command. Your tools. Your workflow. Your codebase, evolving at thought speed.
- Official Homepage: https://claude.com/product/claude-code
- Official Docs: https://code.claude.com/docs
- Installation Method: See the tutorial below on this page
Demonstration
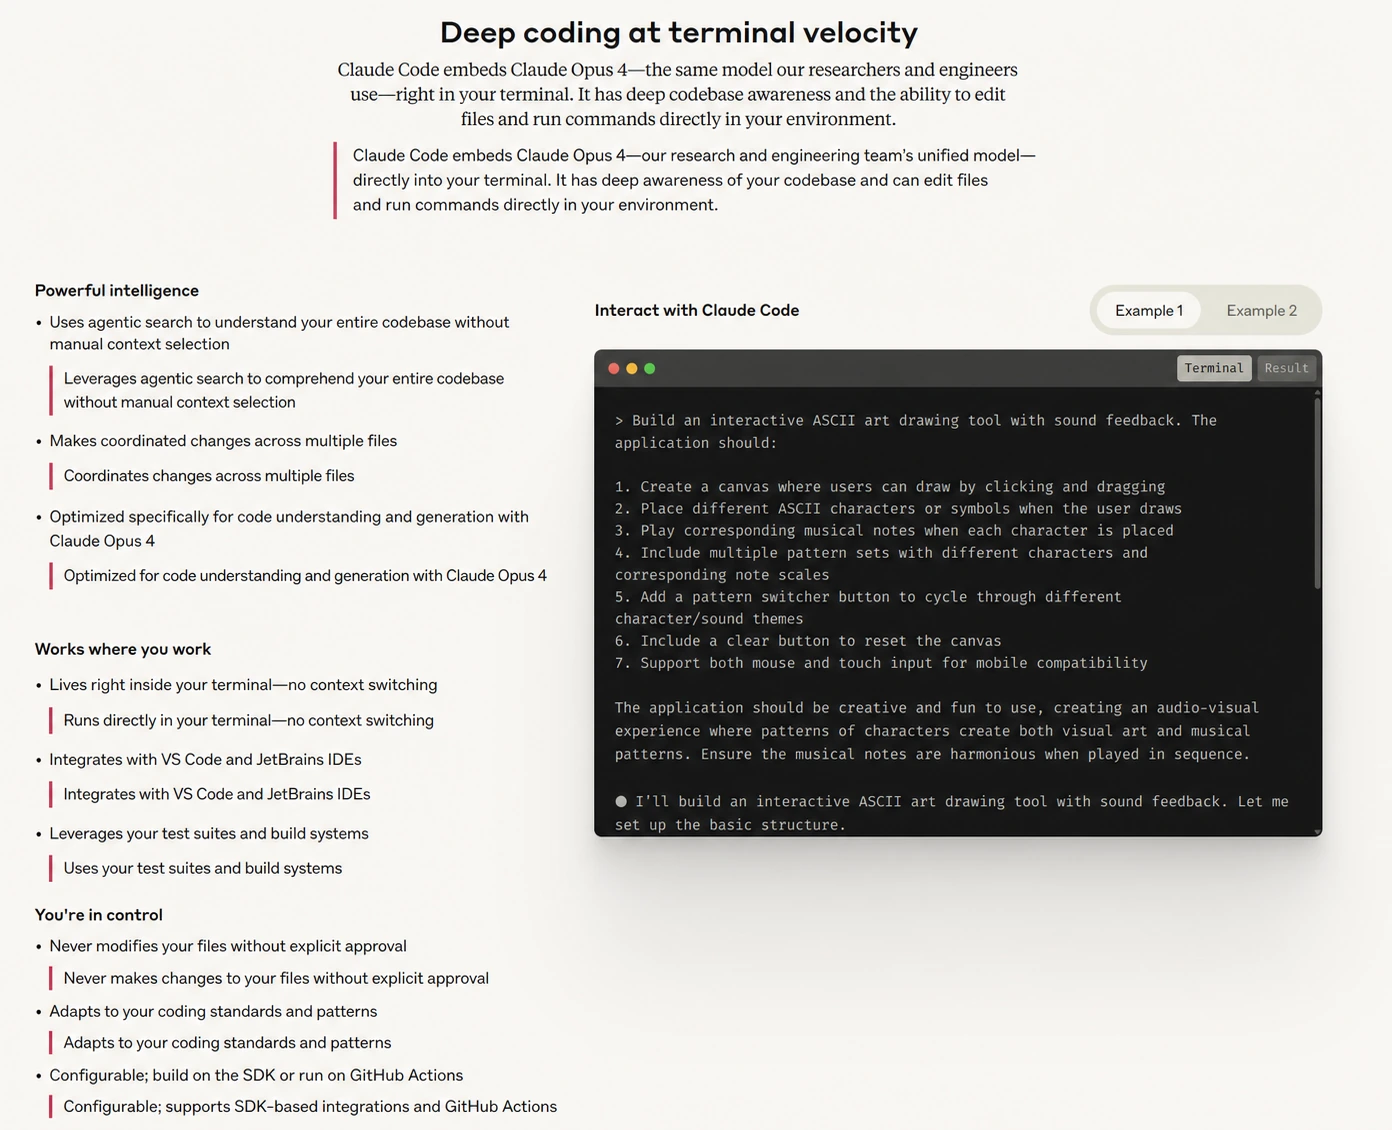
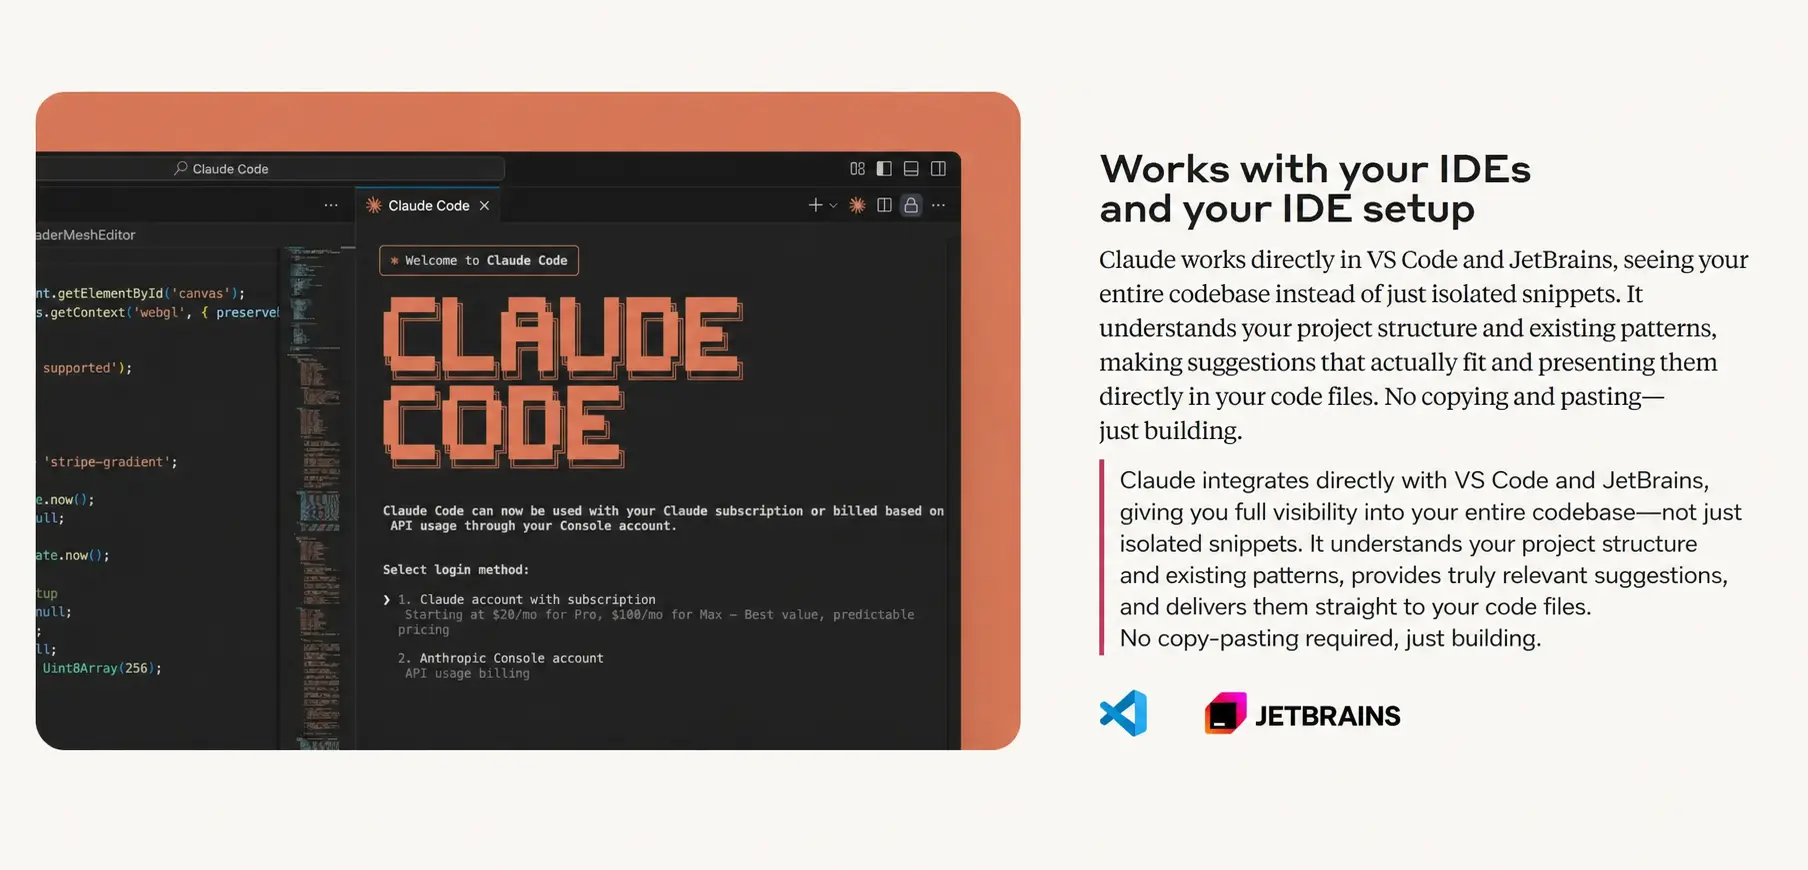
Features
| Function Category | Feature |
|---|---|
| Code Understanding | - Deep codebase analysis, utilizing intelligent agents to search and understand project structure and dependencies |
| - Automatically generate high-level code overviews, quickly helping users understand the codebase | |
| Code Editing | - Supports multi-file collaborative editing, suitable for complex code modifications |
| - Provides practical and usable code suggestions that conform to project patterns and architecture | |
| Integration Capabilities | - Supports direct execution in the terminal without context switching |
| - Seamless integration with VS Code and JetBrains IDEs, eliminating the need for copy-pasting | |
| Code Generation and Optimization | - Automatically generate code, create tests, fix errors, supporting the complete workflow from concept to commit |
| - Optimized for code generation and understanding, using the latest models such as Claude Opus 5.5 by default | |
| Security and Flexibility | - Changes require explicit user authorization, making file and command operations safer |
| - Adapts to user code standards and supports custom configuration | |
| Toolchain Integration | - Supports integration with tools like GitHub and GitLab to achieve automated workflows |
| - Integrates with testing suites and build systems, enhancing existing development tools | |
| Cross-Platform and Extensibility | - Supports Windows, macOS, and Linux operating systems |
| - Configurable to run in SDKs or GitHub Actions, flexibly adapting to different requirements | |
| Primary Use Cases | - Codebase onboarding and understanding, rapid ramp-up for new members |
| - Code issue fixing and optimization workflow, from problem analysis to PR submission | |
| - Project code refactoring and new feature implementation | |
| User Feedback Highlights | - Improves daily development efficiency, saving time spent on routine tasks |
| - Excellent performance in handling complex multi-step tasks, expanding development possibilities |
AI Model Configuration Method
What to enter for ANTHROPIC_BASE_URL and the token
| Environment variable | Value | Notes |
|---|---|---|
ANTHROPIC_BASE_URL | https://api.88api.ai | Do not add /v1; Claude Code requests /v1/messages itself |
ANTHROPIC_AUTH_TOKEN | Your 88API token (starts with sk-) | Create it on the API Keys page |
ANTHROPIC_API_KEY | Do not set | If set, it takes priority, and an old key causes a 401; see Error Codes and Common Errors |
Claude Code needs only two settings to connect to 88API: ANTHROPIC_BASE_URL set to https://api.88api.ai (no /v1), and ANTHROPIC_AUTH_TOKEN set to the API key you created at https://88api.ai/keys. The one-click scripts below write both values for you; if a script cannot run, see "Manual Configuration" at the end of this page.
Which token group to choose
Claude Code uses claude-opus-5-5 by default and claude-haiku-5-5 for background tasks. When creating the token, choose a group that contains both models (for example 「Claude Max池 可外接」 or 「Claude 官转 可蒸馏」).
With the 「Claude Kiro」 group, add "ANTHROPIC_DEFAULT_HAIKU_MODEL": "claude-sonnet-5-5" to the env section of settings.json. With the 「Claude 反重力」 group (4.6 series only), add "ANTHROPIC_MODEL": "claude-opus-4-6", "ANTHROPIC_DEFAULT_OPUS_MODEL": "claude-opus-4-6", "ANTHROPIC_DEFAULT_SONNET_MODEL": "claude-sonnet-4-6" and "ANTHROPIC_DEFAULT_HAIKU_MODEL": "claude-sonnet-4-6". The location of settings.json is given under "Manual Configuration" at the end of this page.
Windows Graphical Guide
1. (Optional) Install Node.js Environment
Node.js 22 or later is only needed if you plan to install Claude Code with npm; the official install command below does not need Node.js.
Node.js Environment Installation Steps
- Open your browser and visit https://nodejs.org/
- Click to download the "LTS" version (Long-Term Support version recommended)
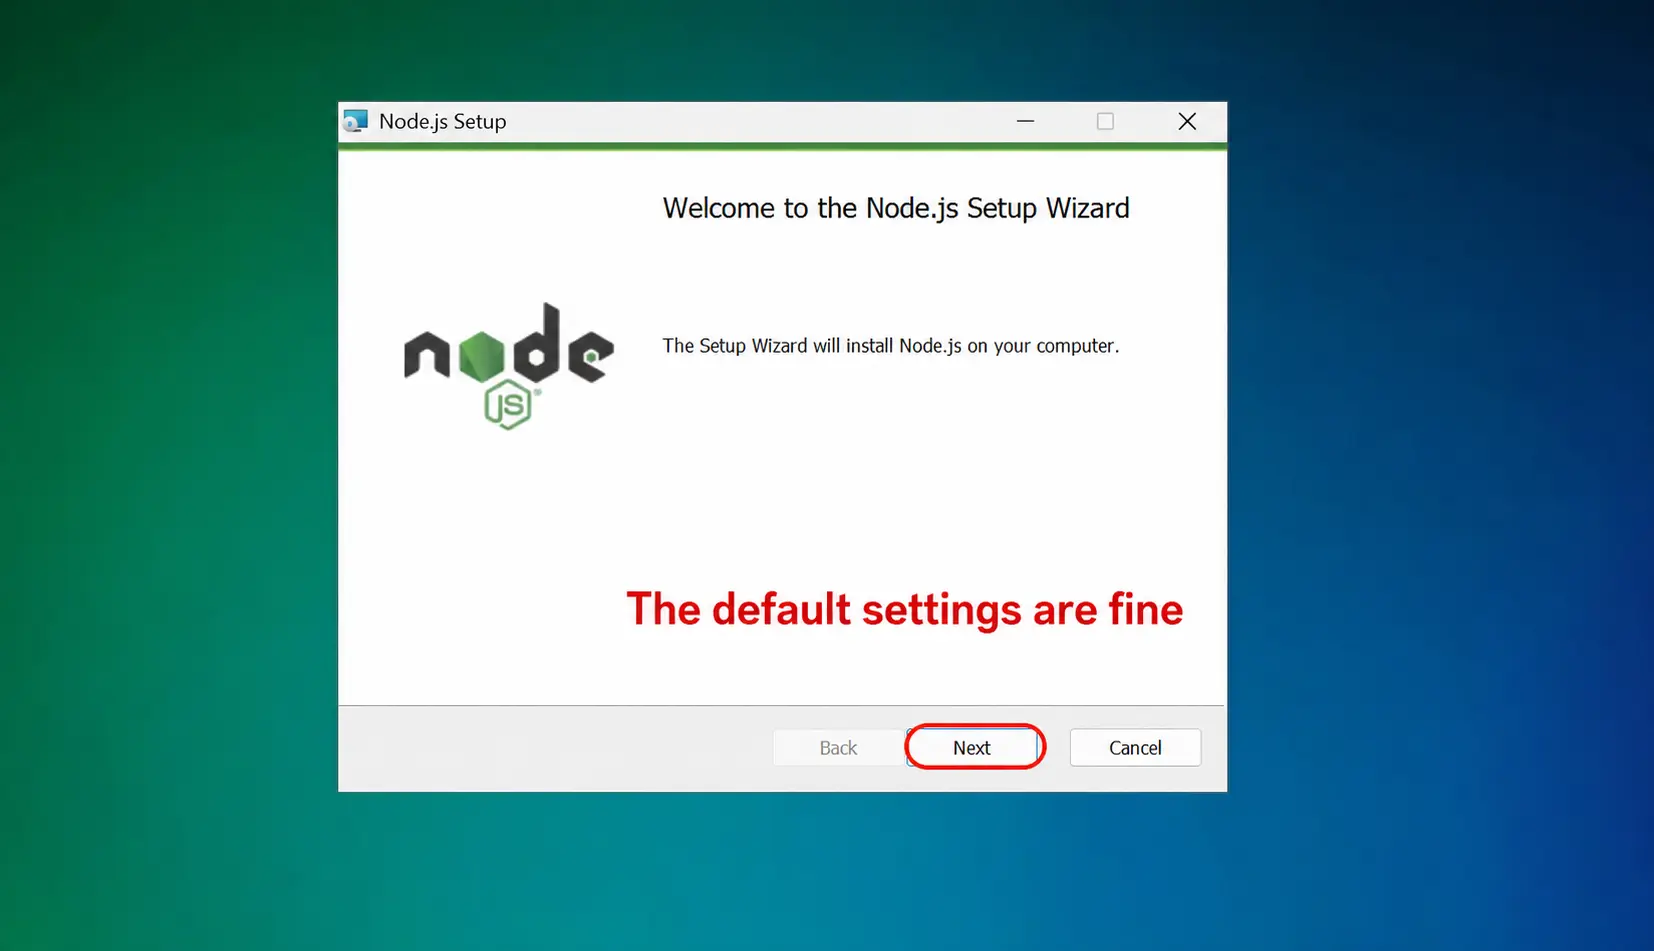
- After the download is complete, double-click the .msi file
- Follow the installation wizard to complete the installation, keeping the default settings
Windows Notes
It is recommended to use PowerShell instead of CMD (a normal window is enough; you do not need to run as administrator). Some antivirus software may flag it incorrectly; you might need to add it to a whitelist.
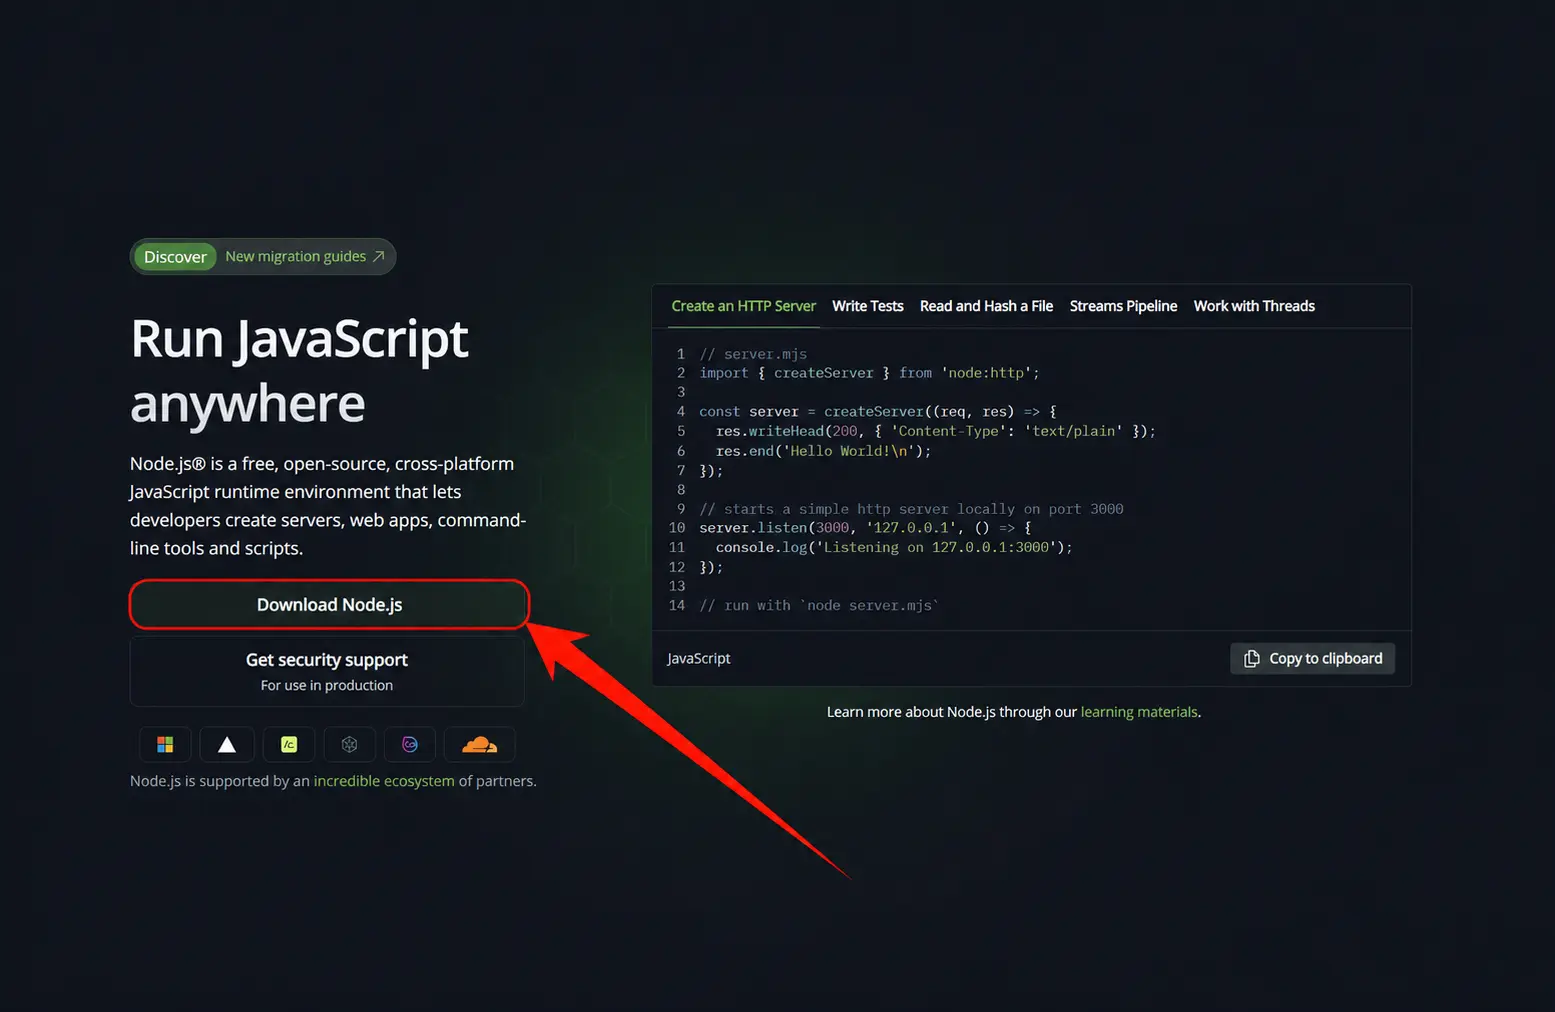
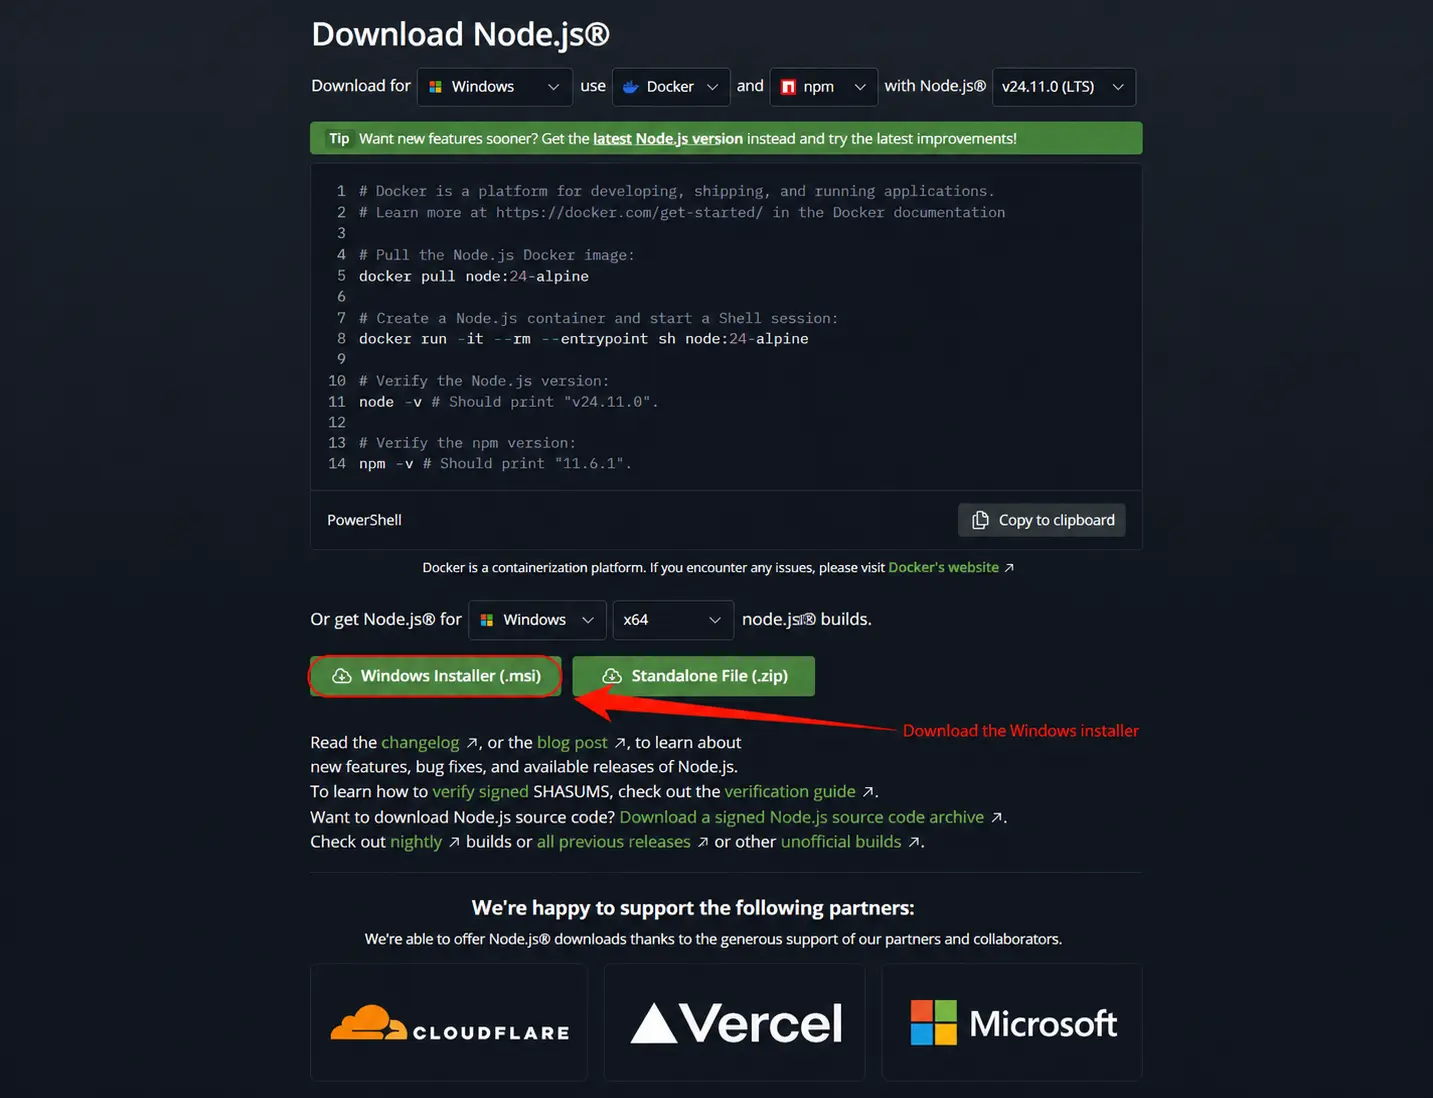
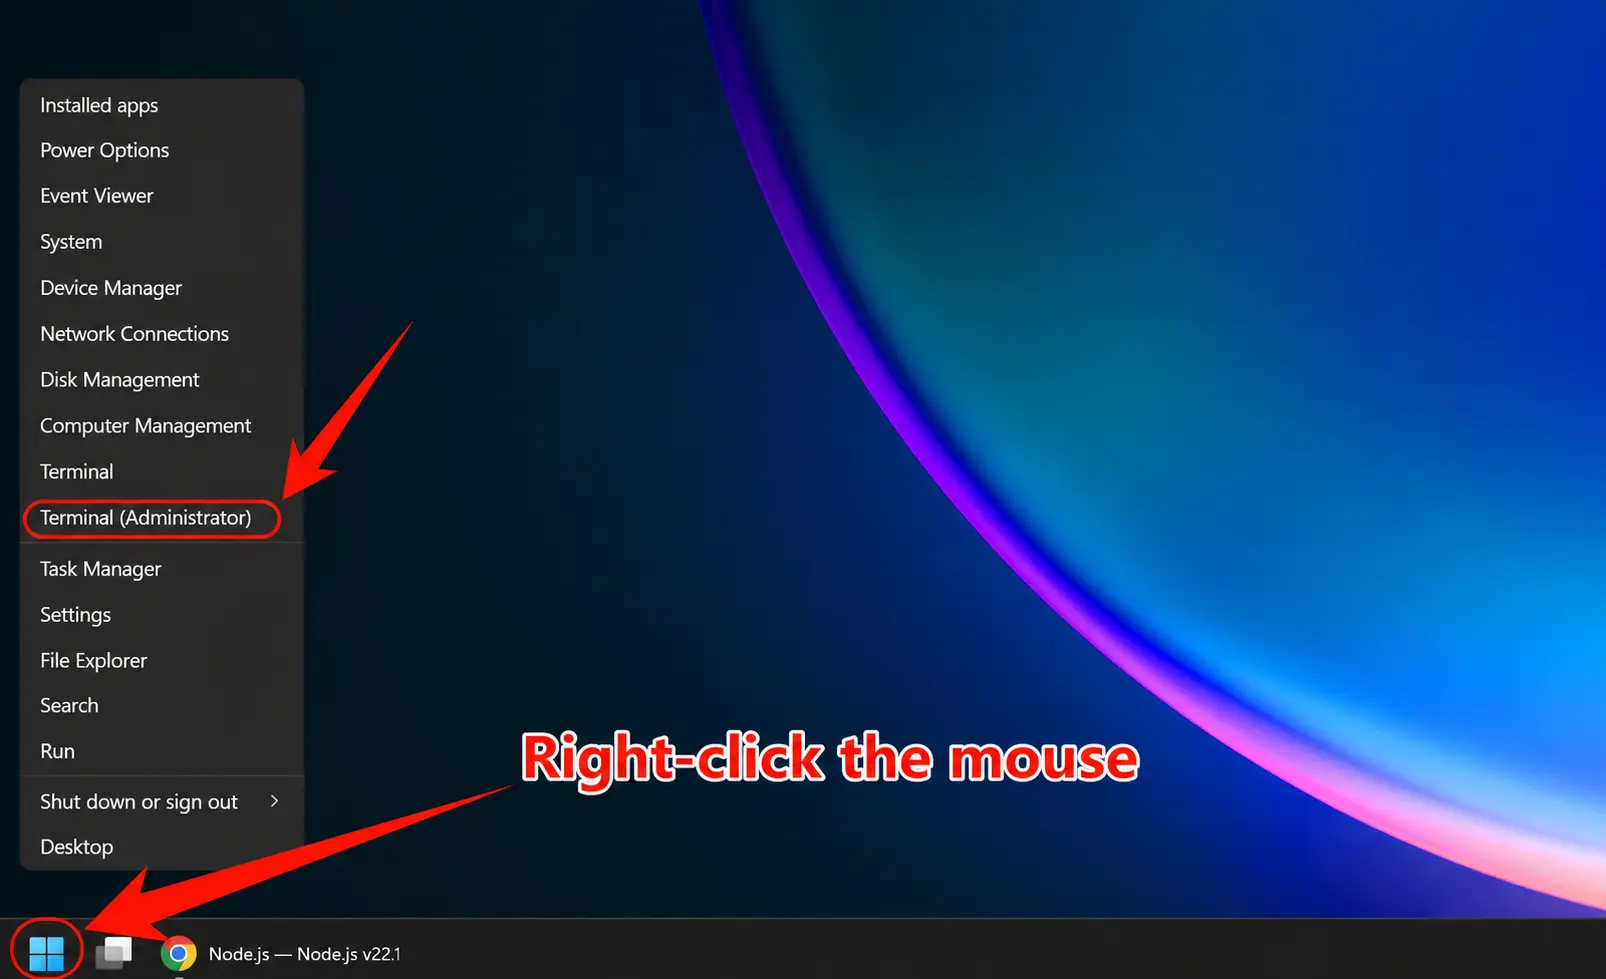
The screenshot opens "Terminal (Admin)"; a normal "Terminal" is enough, administrator rights are not needed.
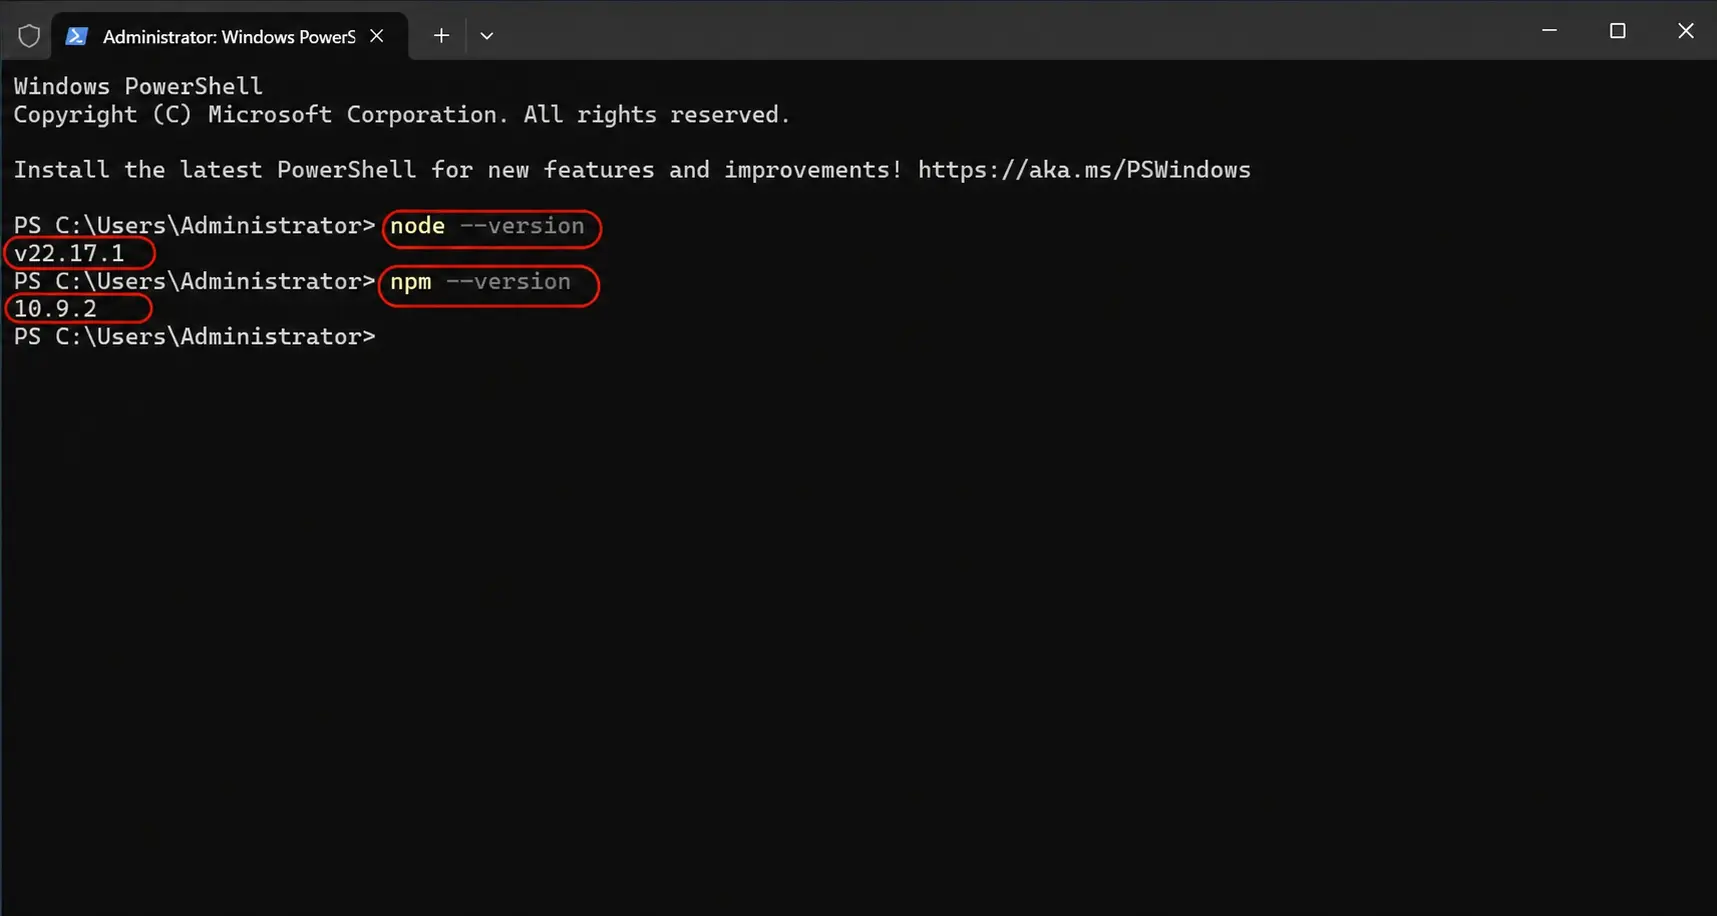
Verify Successful Installation
After installation is complete, open PowerShell or CMD and enter the following commands. If the version numbers are displayed, the installation was successful:
node --version
npm --version
2. (Recommended) Install Git for Windows
Note
Claude Code is installed and run in PowerShell or CMD; you do not need to install it from Git Bash. Git for Windows is recommended but optional: when it is installed, Claude Code uses Git Bash to run commands; without it, Claude Code uses its PowerShell tool instead. If Claude Code reports that it cannot find Git Bash, set CLAUDE_CODE_GIT_BASH_PATH in the env section of settings.json to your bash.exe (for example C:\Program Files\Git\bin\bash.exe).
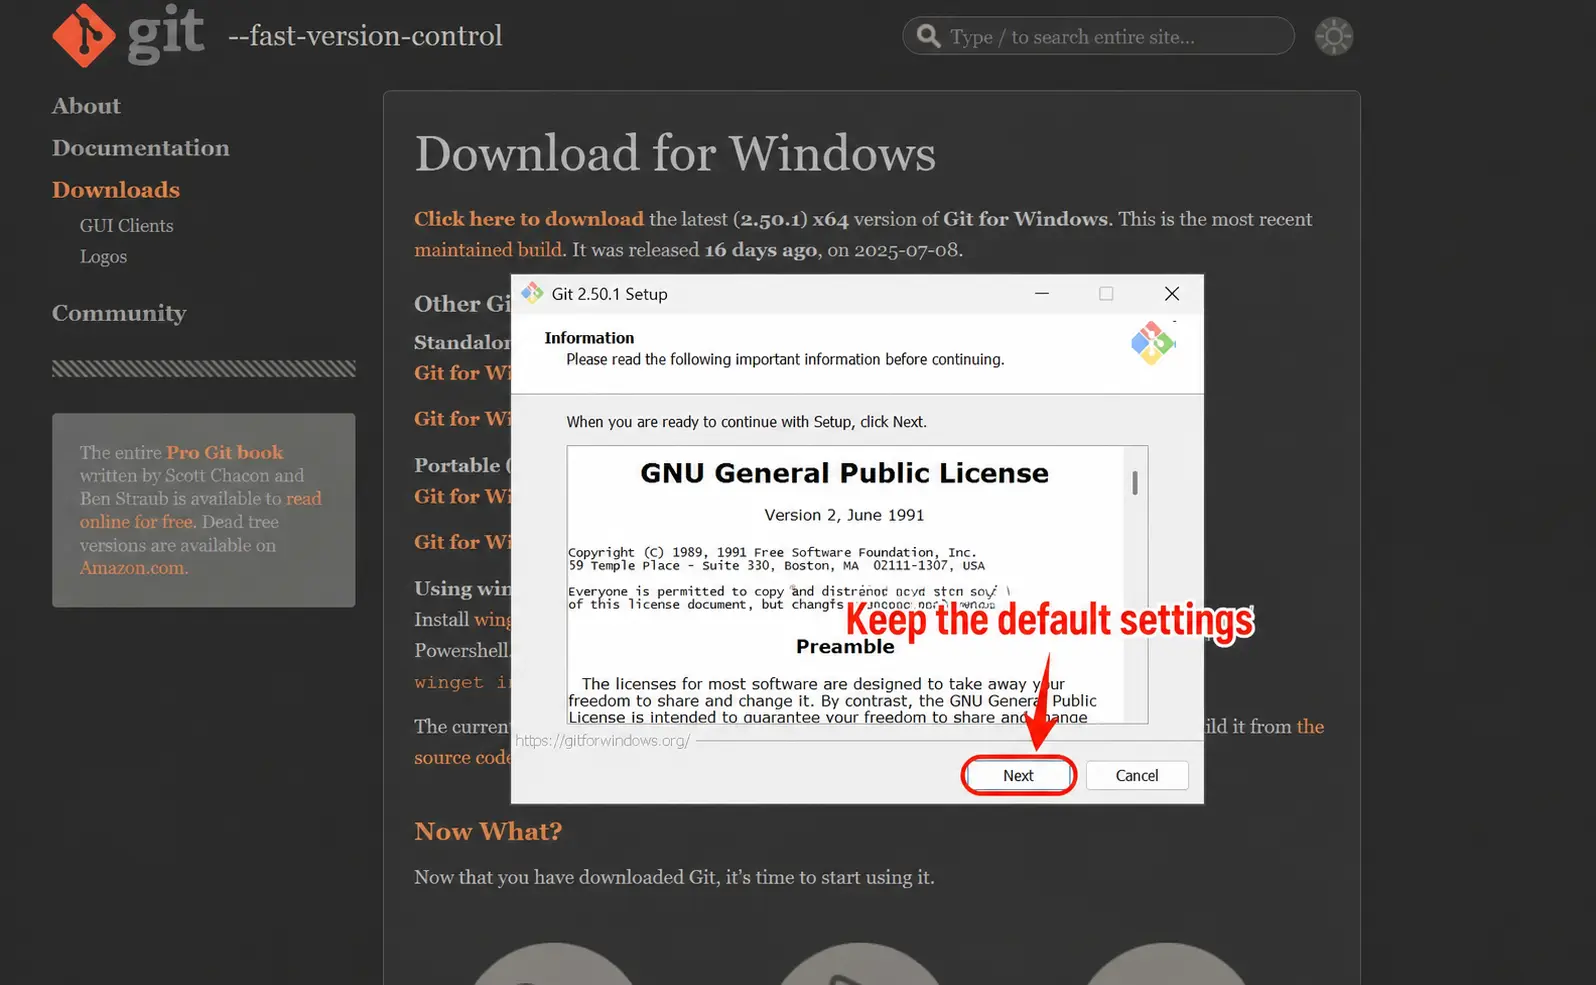
Download and Install Git for Windows
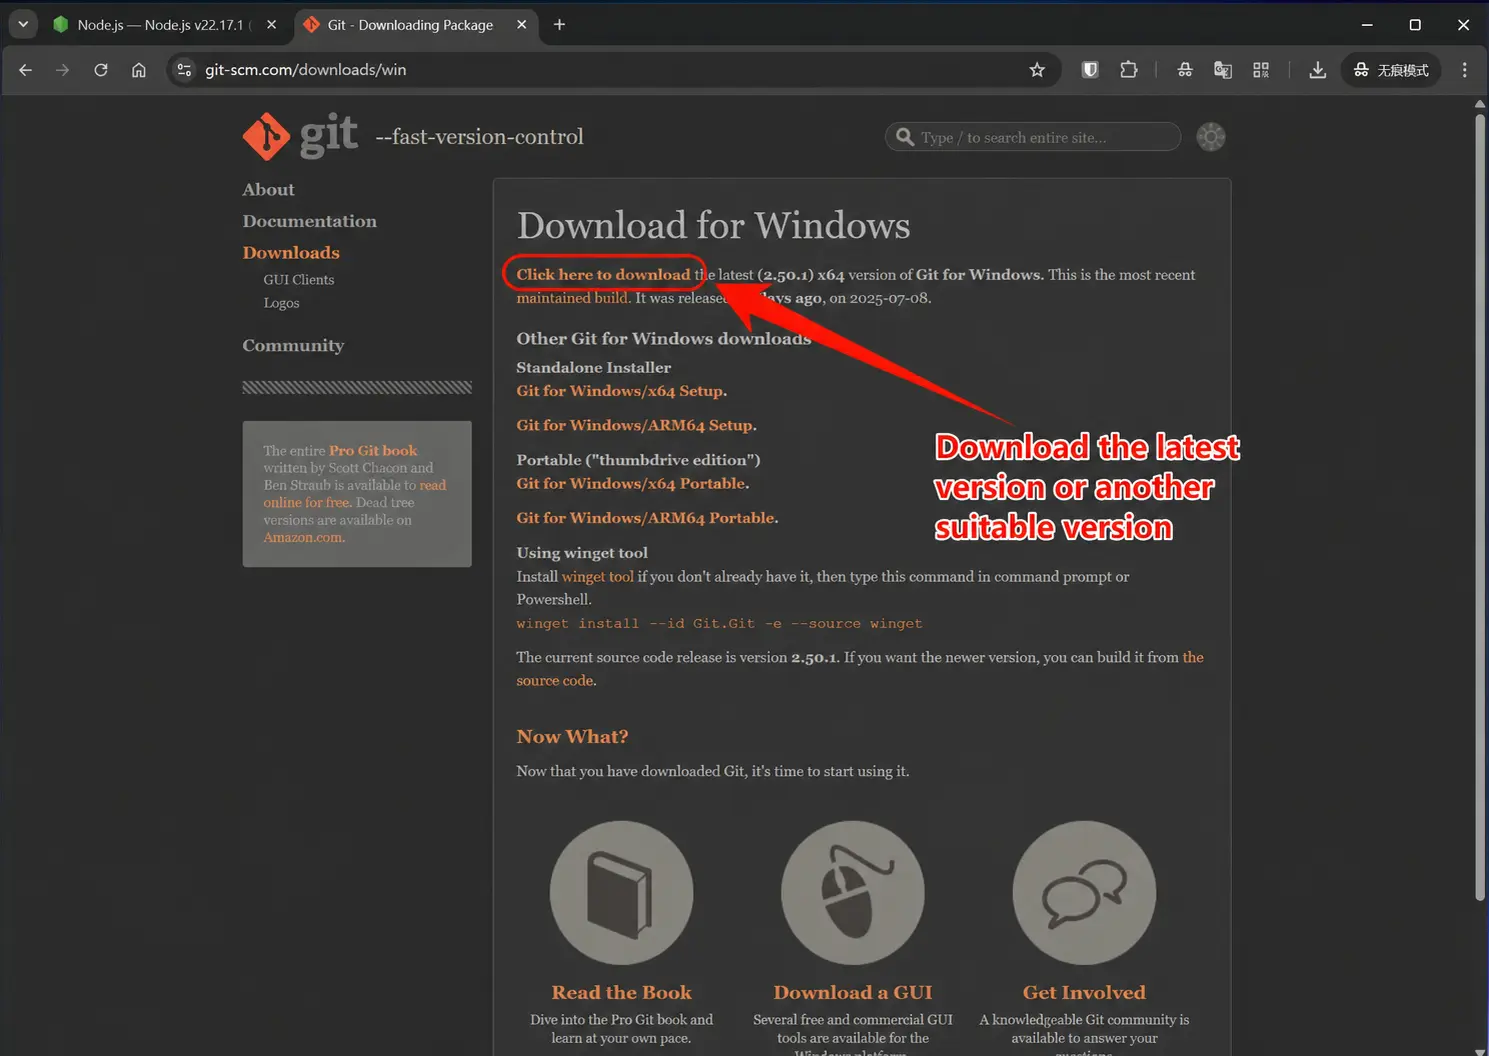
- Visit https://git-scm.com/downloads/win
- Click "Download for Windows" to download the installer
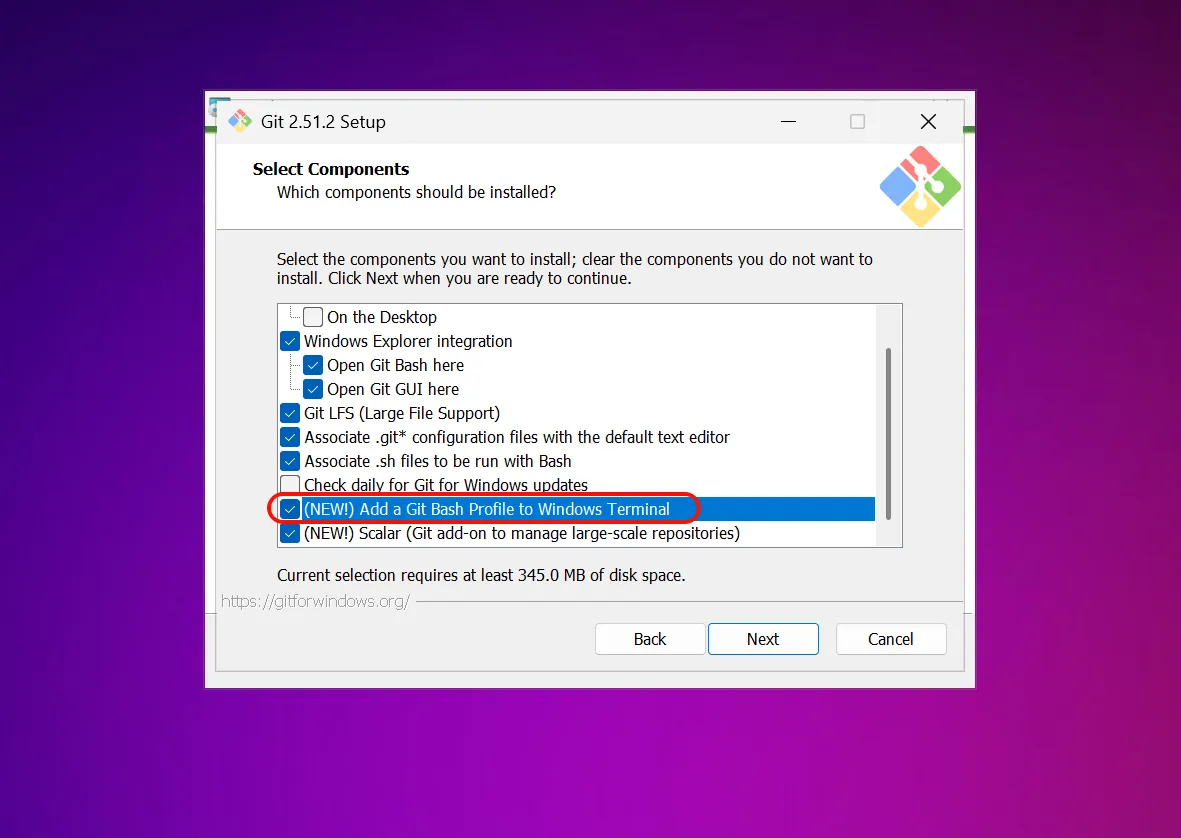
- Run the downloaded .exe installation file
- Keep the default settings during the installation process and click "Next" to complete the installation
Verify Git Installation
After installation is complete, open Git Bash and enter the following command. If the version number is displayed, the installation was successful:
git --version3. Install Claude Code
Install Claude Code
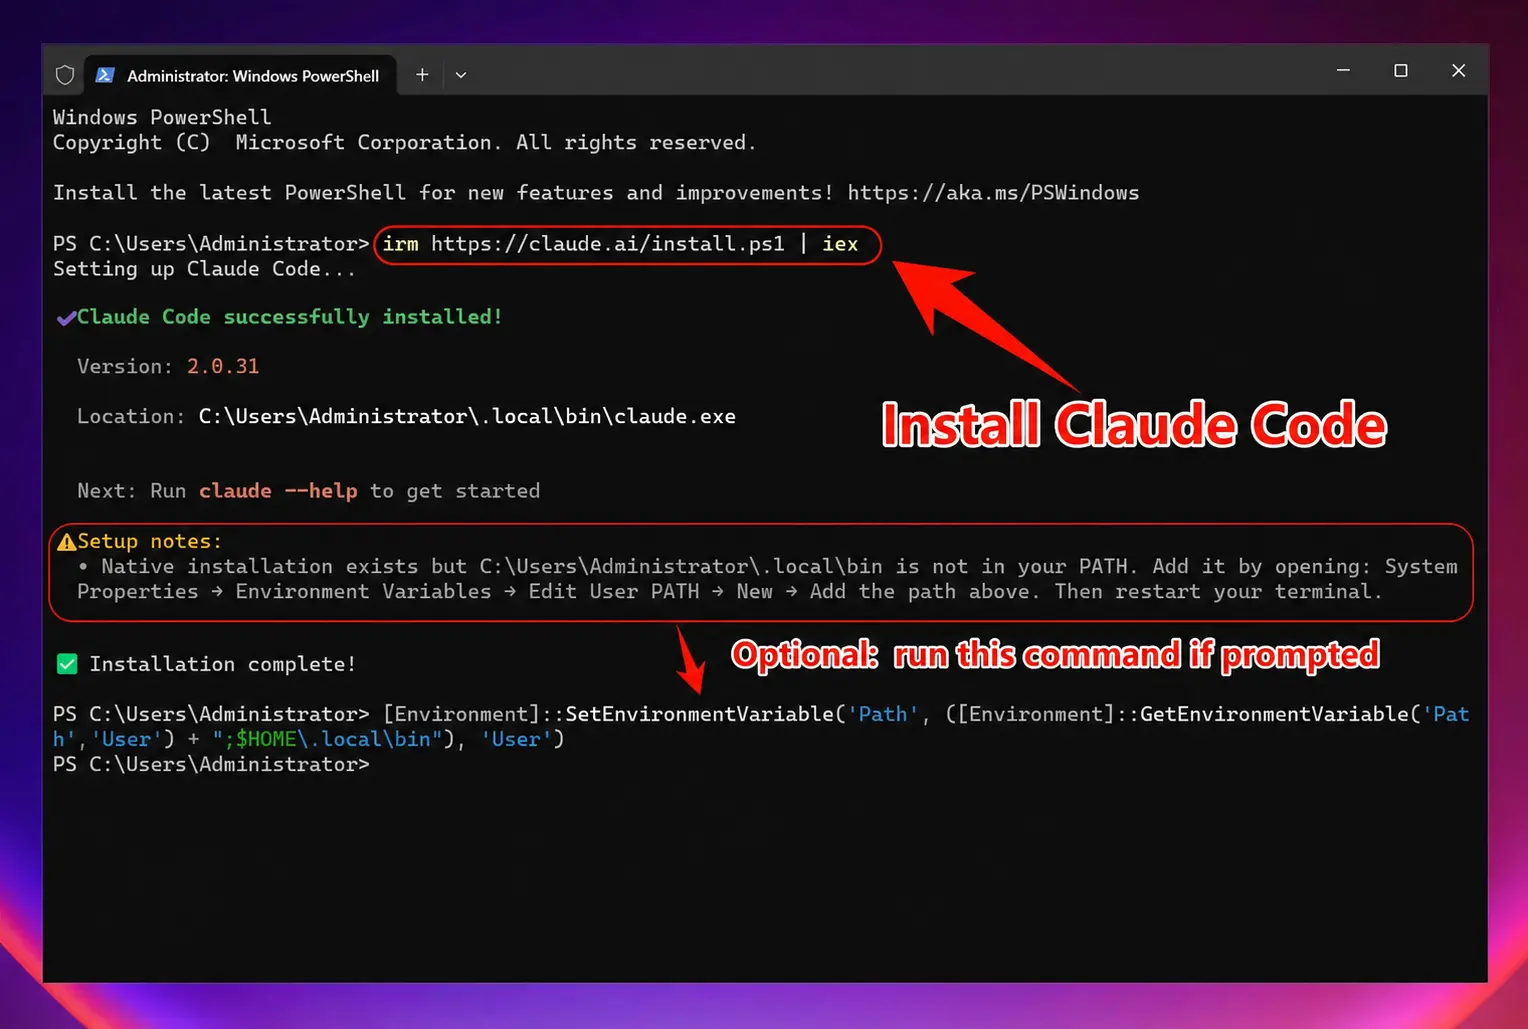
Open PowerShell (no administrator rights needed) and run the official install command below. Alternative: if Node.js 22+ is installed, you can also run npm install -g @anthropic-ai/claude-code.
irm https://claude.ai/install.ps1 | iexCMD users: curl -fsSL https://claude.ai/install.cmd -o install.cmd && install.cmd && del install.cmd
Add ~/.local/bin to PATH (Only if prompted)
If the installer says that ~/.local/bin is not in your PATH, run the command below in PowerShell, then reopen PowerShell:
[Environment]::SetEnvironmentVariable('Path', ([Environment]::GetEnvironmentVariable('Path','User') + ";$HOME\.local\bin"), 'User')Verify Claude Code Installation
After installation is complete, enter the following command to check if the installation was successful. If the version number is displayed, congratulations! Claude Code has been successfully installed.
claude --version4. Set Environment Variables
One-Click Setup Command (Windows System)
To connect Claude Code to 88API, run the following two lines in PowerShell:
curl.exe --ssl-no-revoke -fsSL https://88api.ai/helper/claude-cli-setup.ps1 -o "$env:TEMP\claude-cli-setup.ps1"
PowerShell -NoProfile -ExecutionPolicy Bypass -File "$env:TEMP\claude-cli-setup.ps1"
Do not add /v1 to the Base URL
When the script asks for the 88API gateway address (prompt: 「请输入 88API 网关地址(不要带 /v1),直接回车使用 https://api.88api.ai」), just press Enter to use the default https://api.88api.ai, then paste the API key you created at https://88api.ai/keys. Claude Code appends /v1/messages itself, so never enter https://api.88api.ai/v1 (that becomes /v1/v1/messages and returns 404 Invalid URL); a trailing / or /v1 typed by mistake is removed by the script automatically.
What the script changes
- Writes the Windows user environment variables
ANTHROPIC_BASE_URL(defaulthttps://api.88api.ai) andANTHROPIC_AUTH_TOKEN(your 88API token), and removes any oldANTHROPIC_API_KEYandCLAUDE_CODE_SIMPLE. - Writes the same two values into the env section of
%USERPROFILE%\.claude\settings.json, after backing up the file assettings.json.bak-<timestamp>. - Asks
[Y/n](default Y) and then renames%USERPROFILE%\.claude\.credentials.jsonto.credentials.json.bak-<timestamp>(equivalent to logging out of your official Claude account, to avoid conflicts with the 88API token), and prints how to restore it.
If you ran an older version of the script
Run the commands above once more. The old script set CLAUDE_CODE_SIMPLE=1, which puts Claude Code into a stripped-down mode (only the Bash, Read and Edit tools; CLAUDE.md, MCP, skills and plugins are not loaded). The new script removes it automatically.
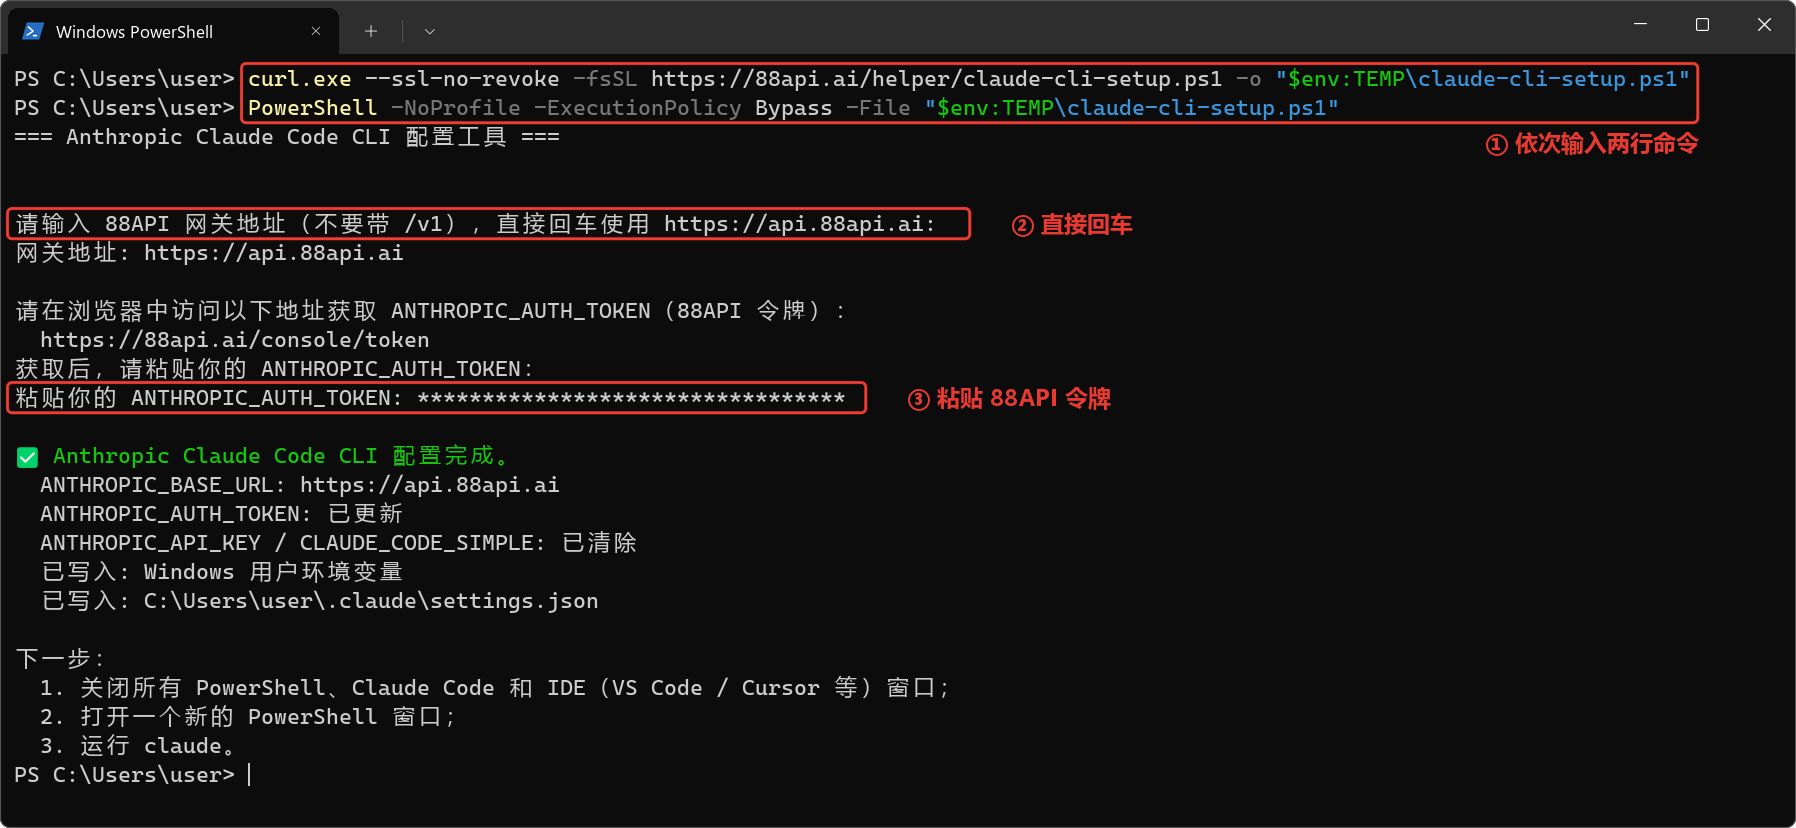
The script's prompts are in Chinese; the values are the same as in the text.
When the script finishes, close all PowerShell / Claude Code / IDE windows, then open a new PowerShell window and run claude. If the one-click script cannot run (for example, because the execution policy blocks it), see "Manual Configuration" at the end of this page.
5. Start Using Claude Code
You can now start using Claude Code!
Launch Claude Code
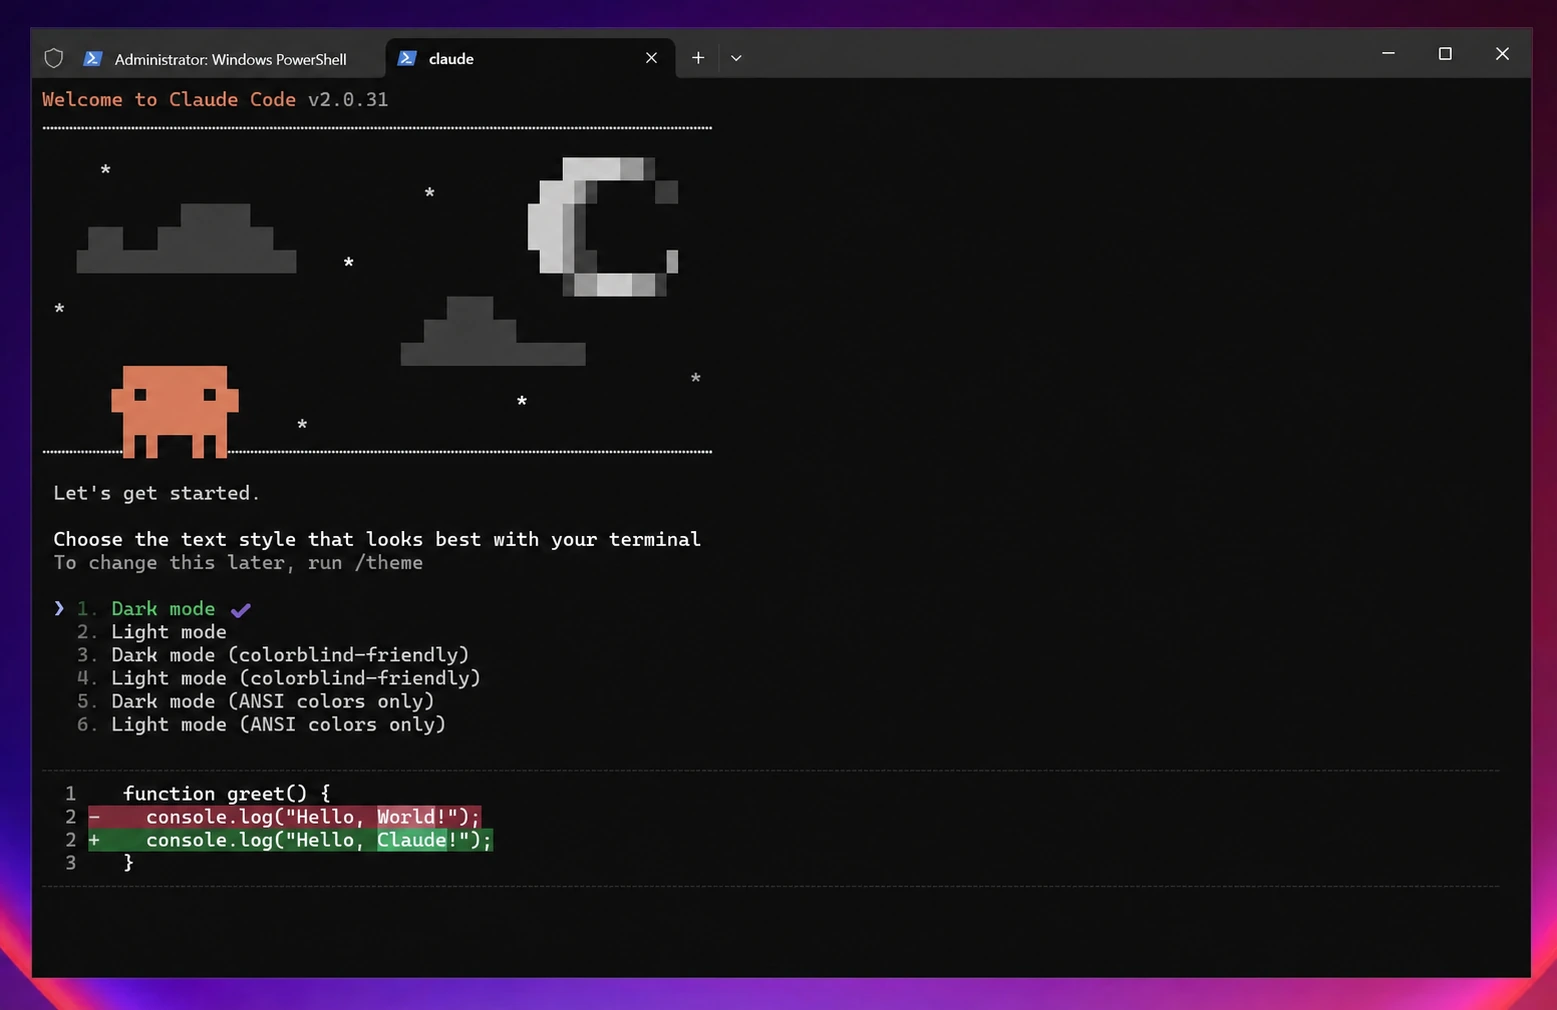
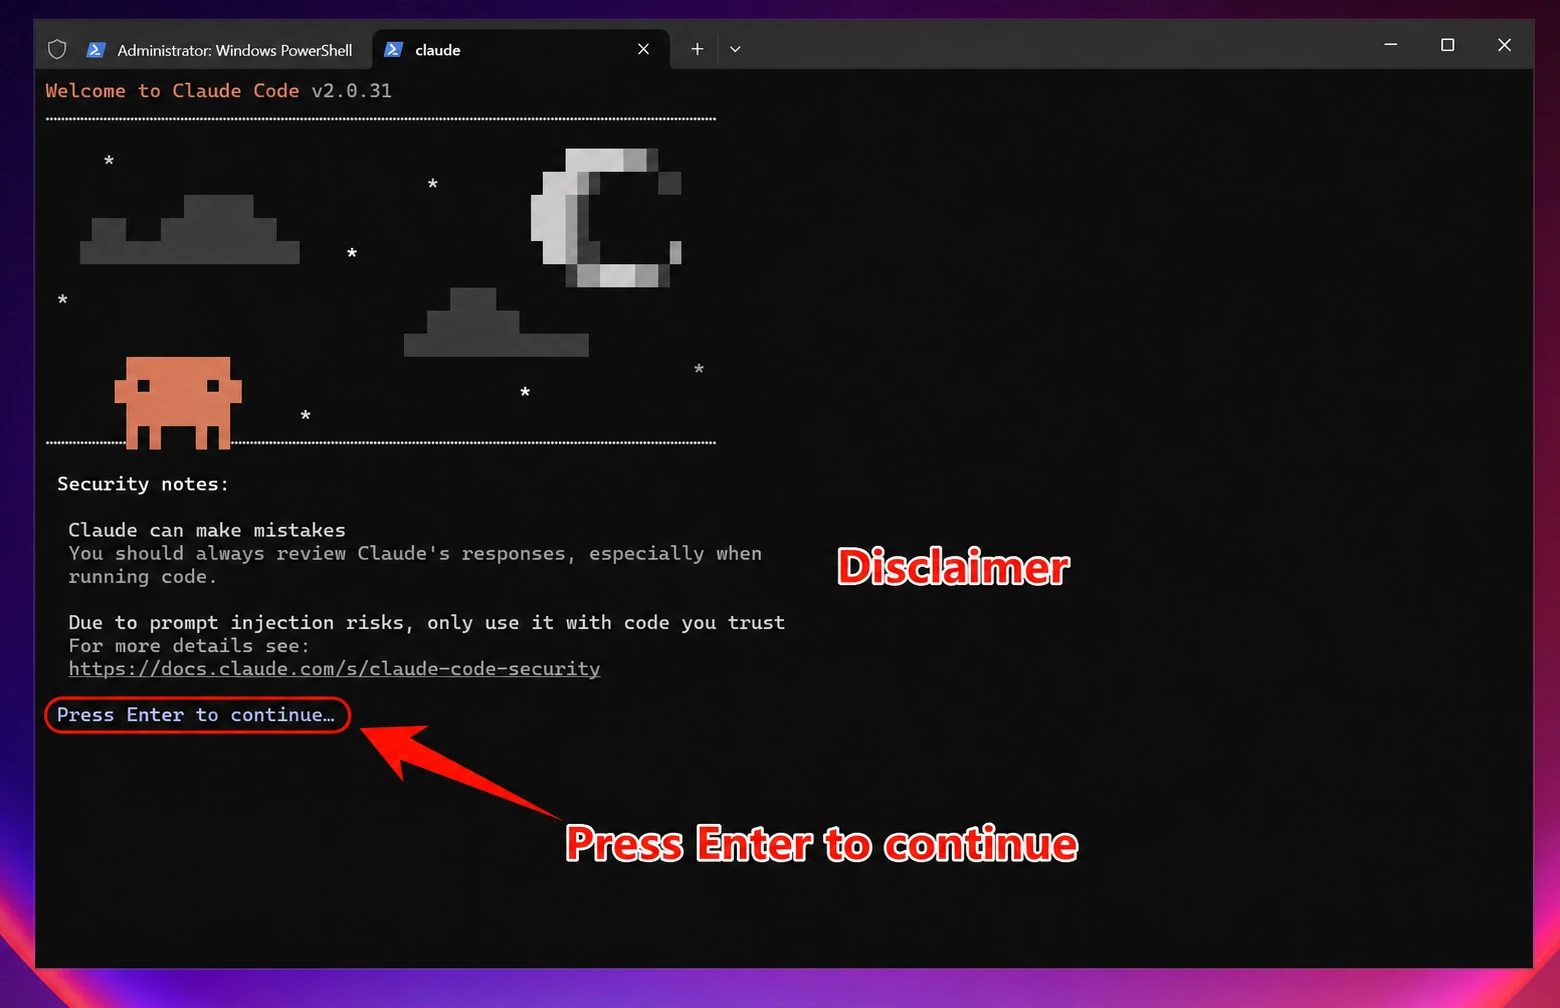
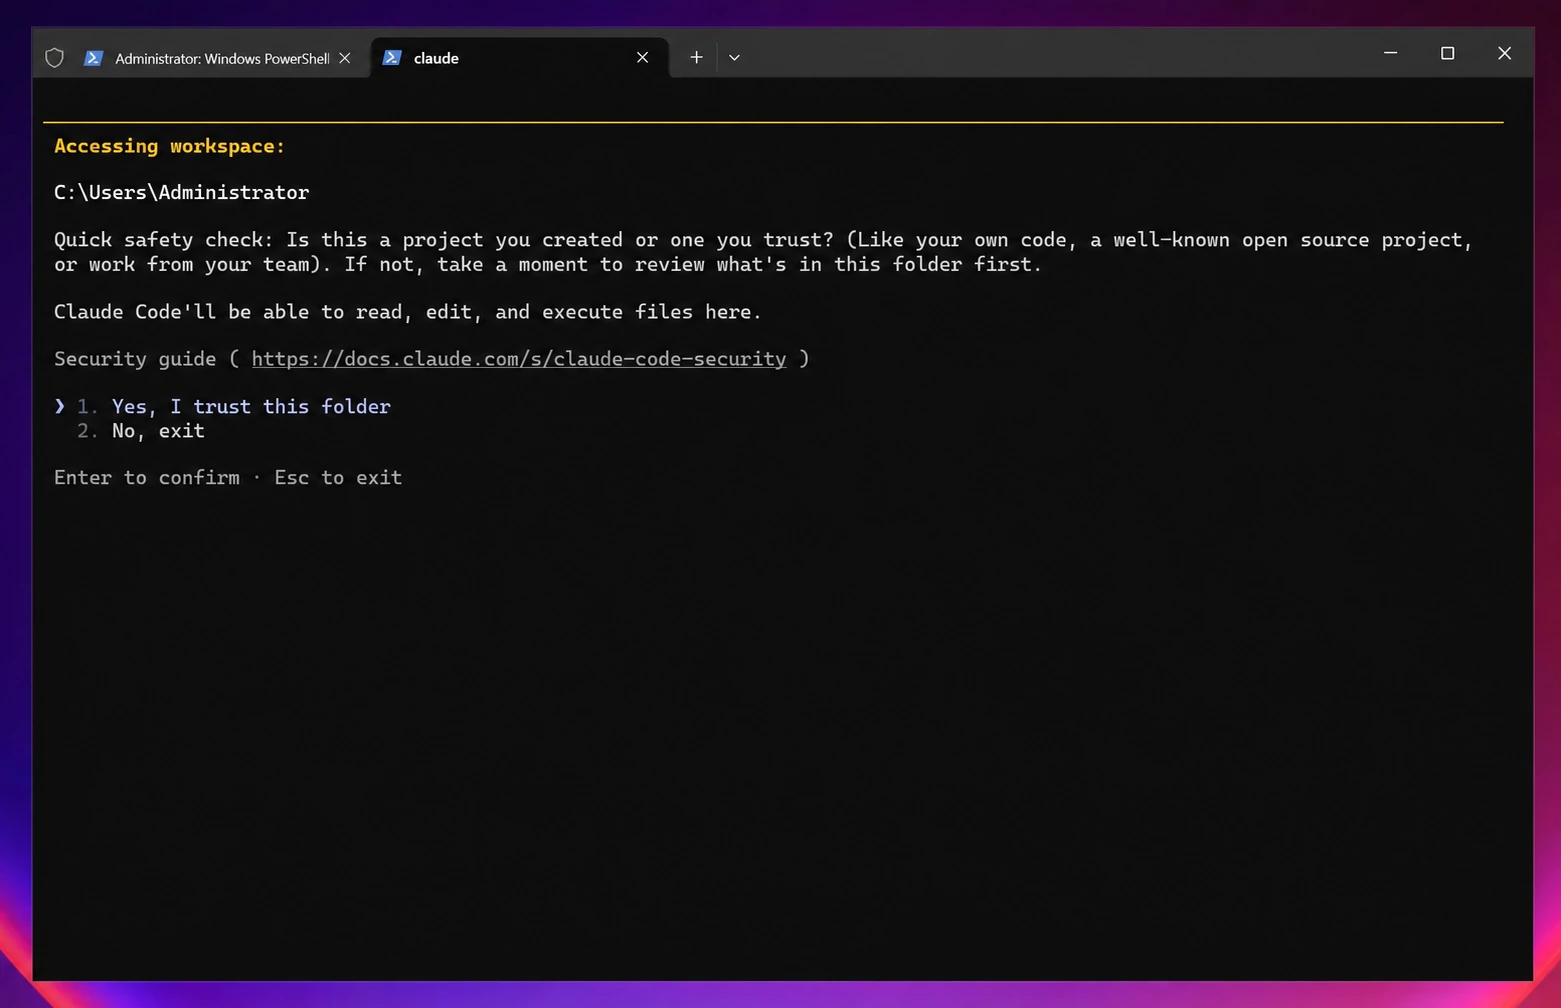
Open a new PowerShell window, go to your project directory and run claude:
cd C:\path\to\your\project
claude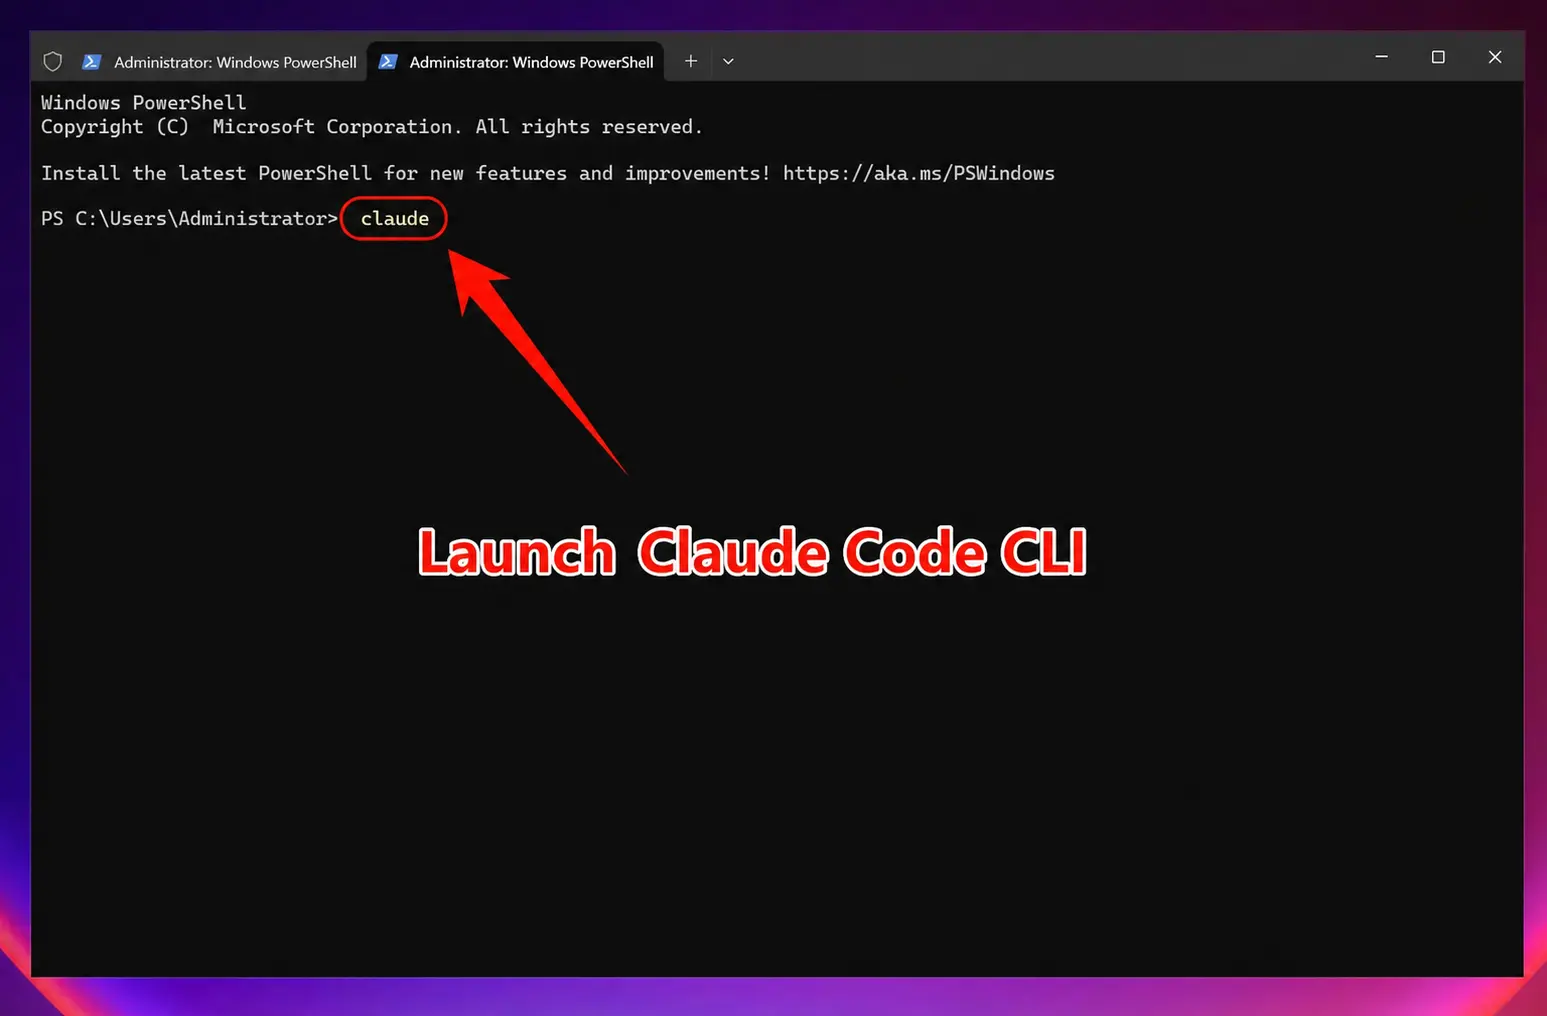
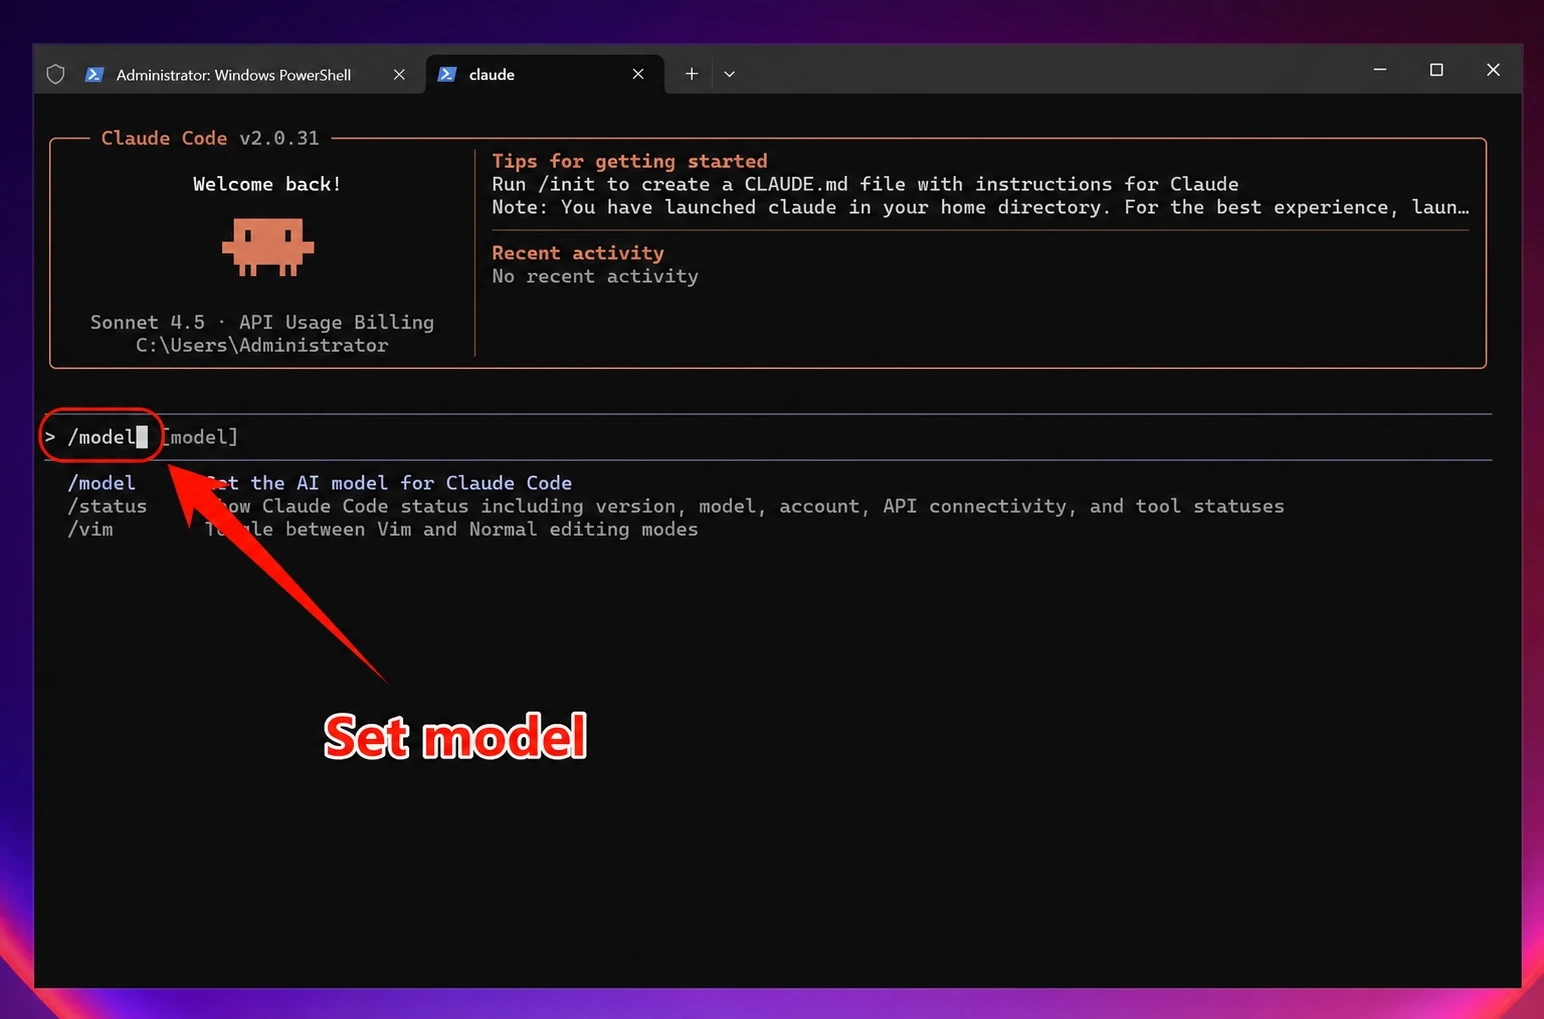
Select Model
Enter /model and press Enter to choose a model. The current version's Default (recommended) is Opus 5.5 (claude-opus-5-5); the list also includes Fable 5.1 (claude-fable-5-1), Sonnet 5.5 (claude-sonnet-5-5) and Haiku 5.5 (claude-haiku-5-5). Use the arrow keys to select a model, press Enter to make it the default, or press s to use it for this session only. All of these models are available on 88API (your token group must contain them; see "Which token group to choose" above). The prices shown in the list are Claude's official prices; you are billed at 88API prices.
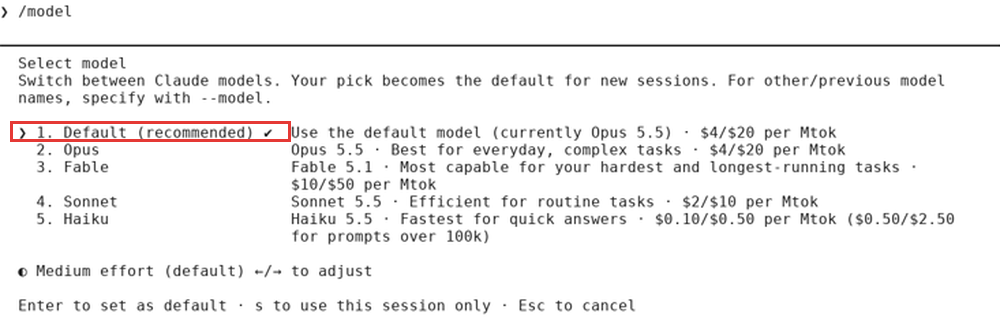
Note: After setting and modifying environment variables, all models used (including official preset models) will call the custom access point and will not consume official account Quota.
macOS Graphical Guide
1. Install Claude Code CLI
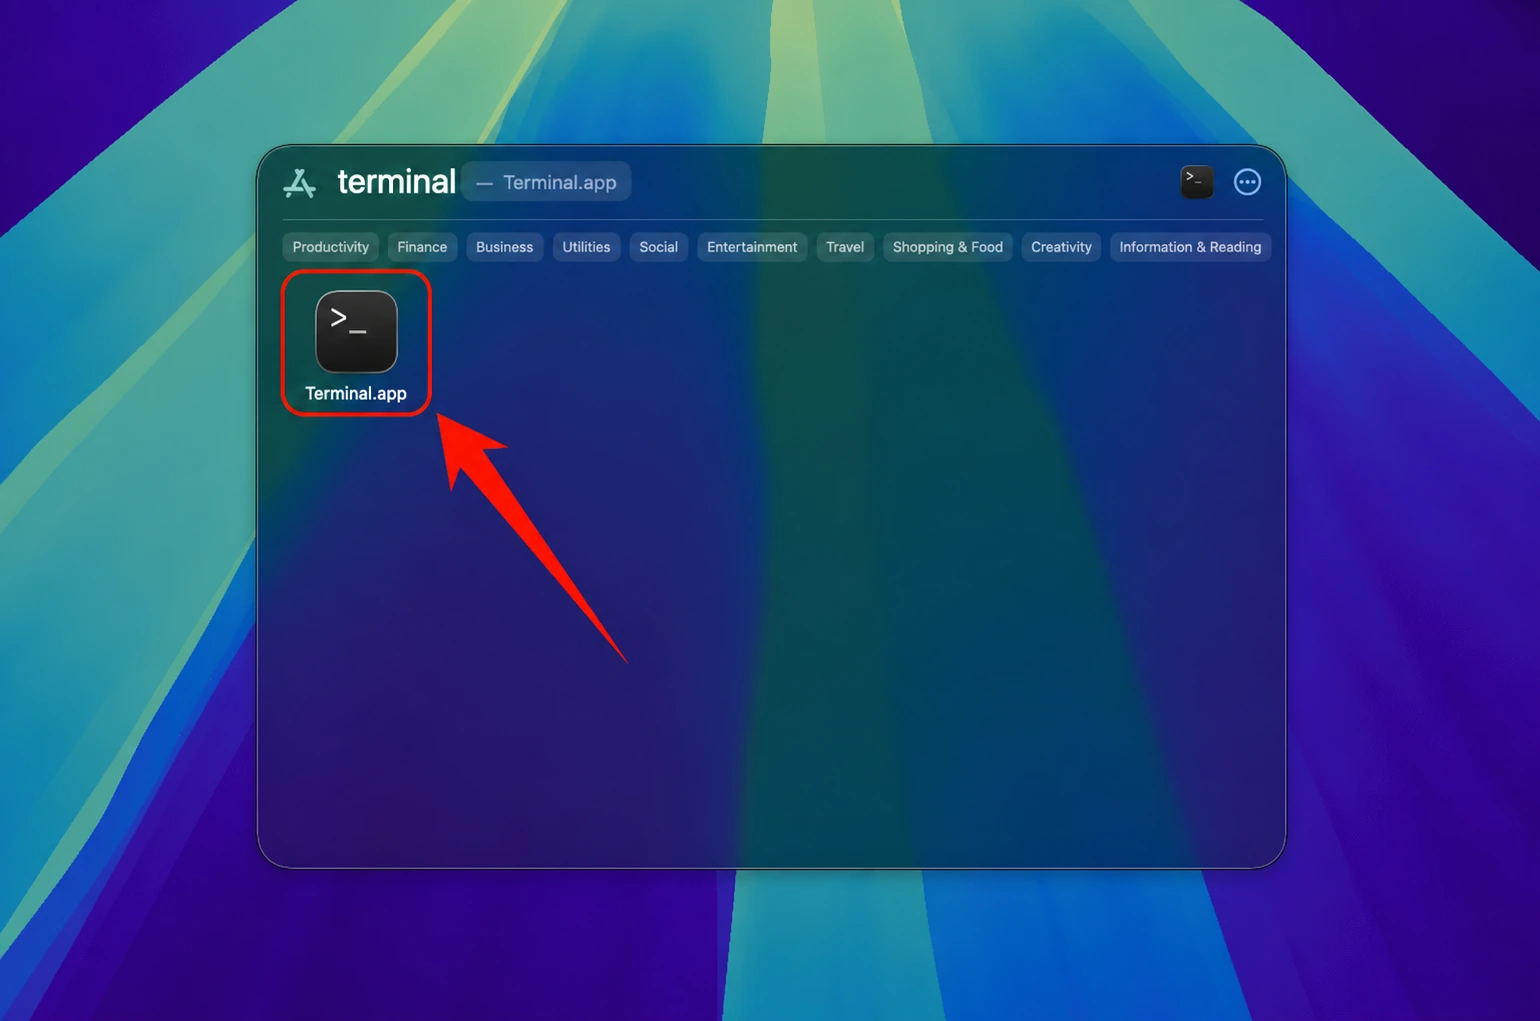
Open Terminal
Install Claude Code
Open Terminal and run the following command:
curl -fsSL https://claude.ai/install.sh | bashOptional: if the installer says that ~/.local/bin is not in your PATH, run the command below (macOS uses zsh by default; if you use bash, replace ~/.zshrc with ~/.bashrc):
echo 'export PATH="$HOME/.local/bin:$PATH"' >> ~/.zshrc && source ~/.zshrc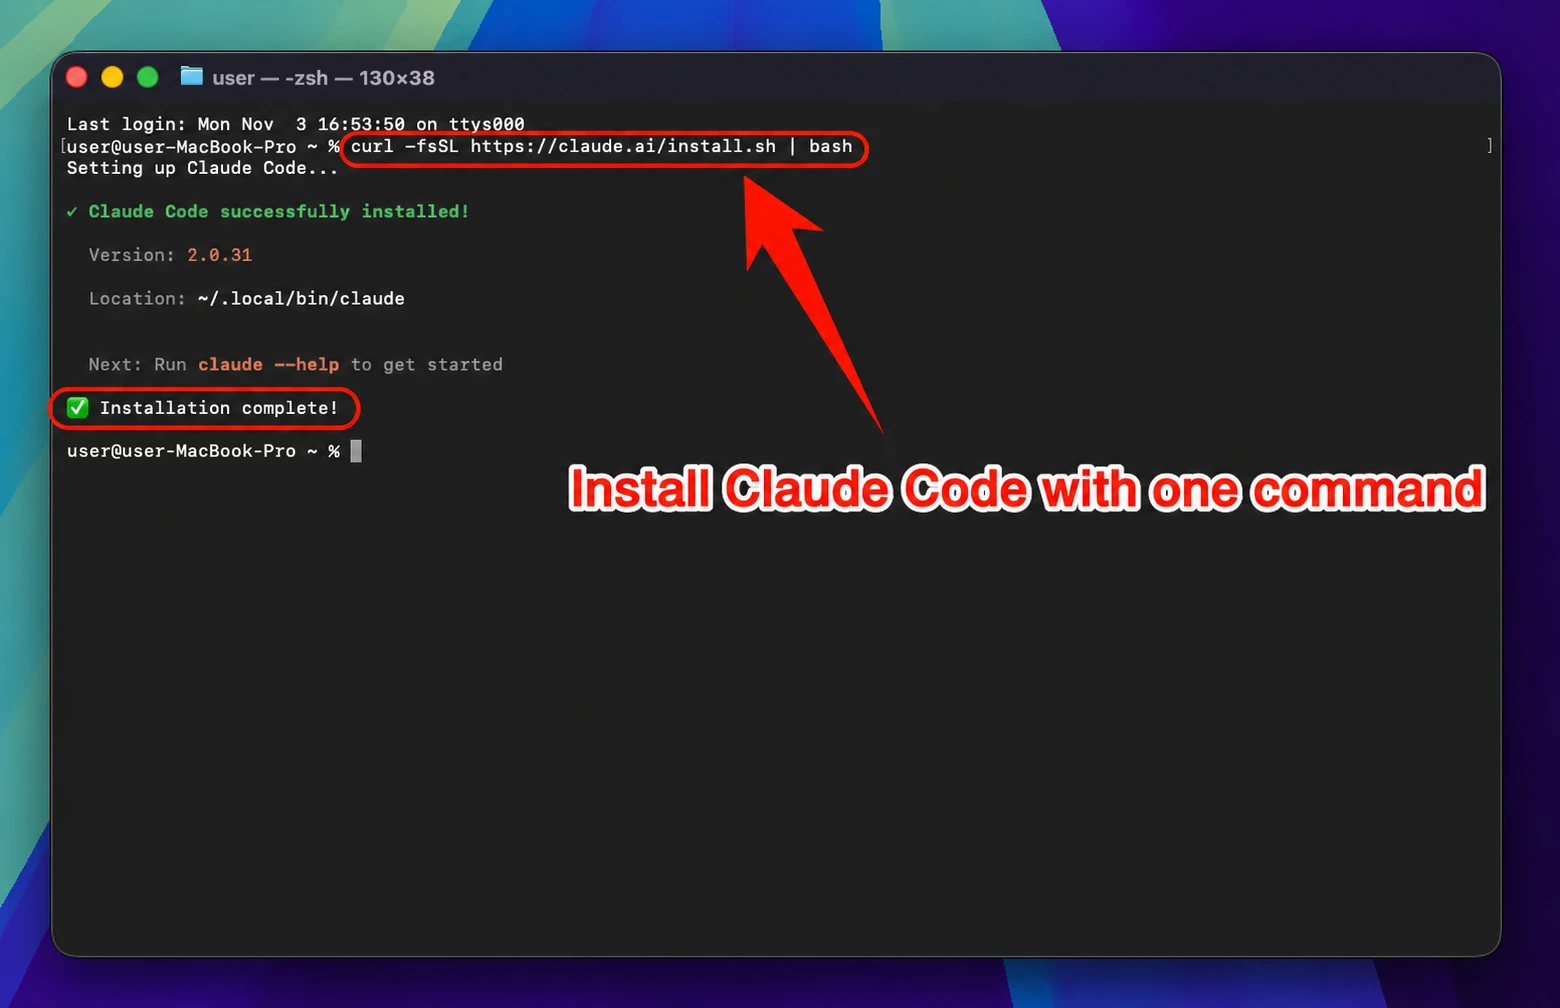
2. Set Environment Variables
To connect Claude Code to 88API, you need to set environment variables:
One-Click Setup for Claude Code Environment Variables
Run the following command in Terminal:
curl -fsSL https://88api.ai/helper/claude-cli-setup.sh | bashDo not add /v1 to the Base URL
When the script asks for the 88API gateway address (prompt: 「请输入 88API 网关地址(不要带 /v1),直接回车使用 https://api.88api.ai」), just press Enter to use the default https://api.88api.ai, then paste the API key you created at https://88api.ai/keys. Claude Code appends /v1/messages itself, so never enter https://api.88api.ai/v1 (that becomes /v1/v1/messages and returns 404 Invalid URL); a trailing / or /v1 typed by mistake is removed by the script automatically.
The script writes export ANTHROPIC_BASE_URL / export ANTHROPIC_AUTH_TOKEN into ~/.bashrc and ~/.zshrc and removes old ANTHROPIC_API_KEY exports there. If ~/.claude/settings.json exists, it is backed up first, then these two env values are updated in it (and ANTHROPIC_API_KEY / CLAUDE_CODE_SIMPLE are removed).
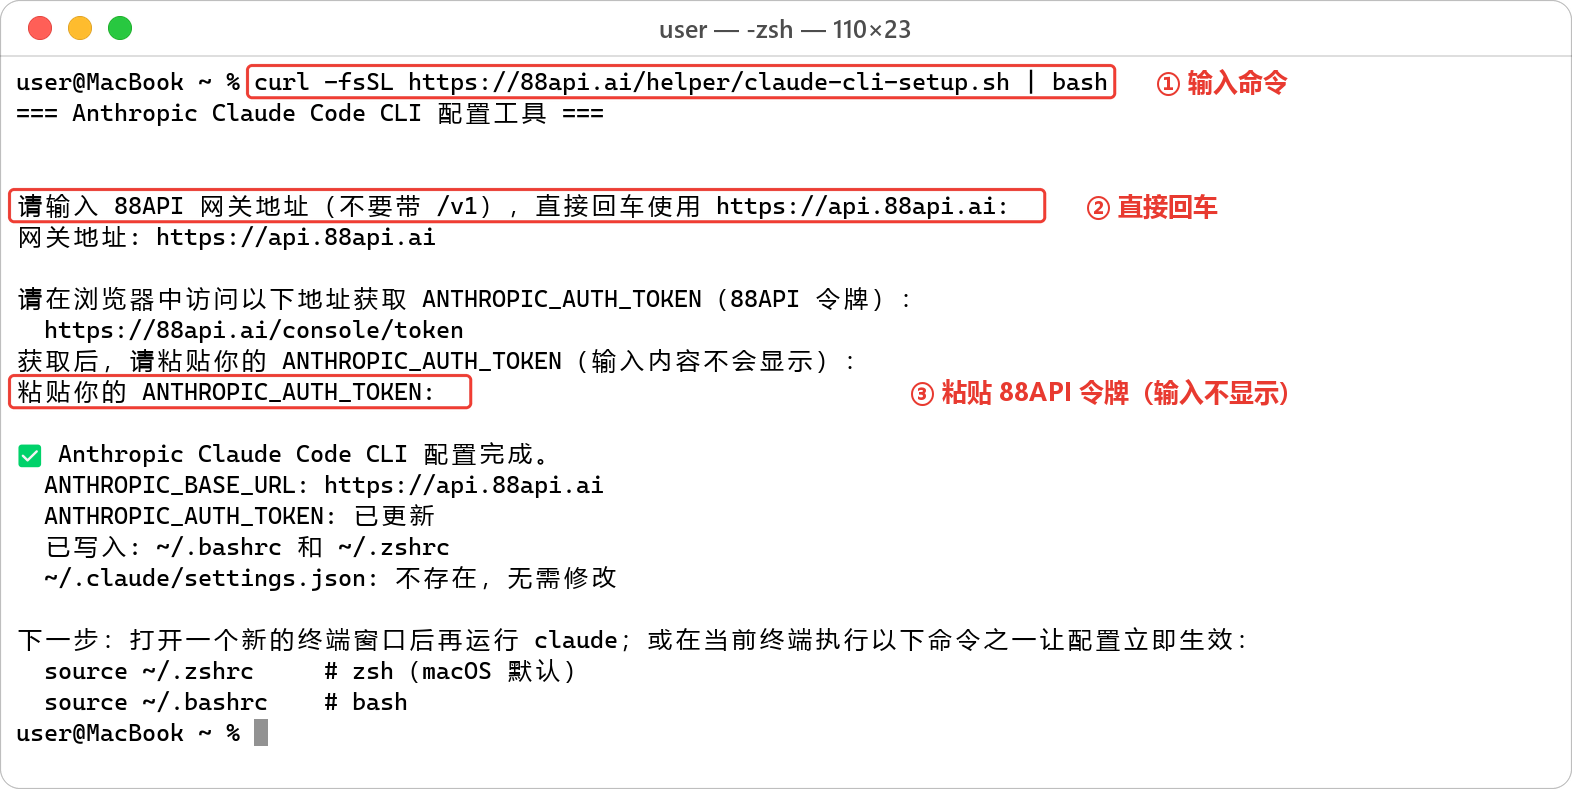
The script's prompts are in Chinese; the values are the same as in the text.
When the script finishes, run source ~/.zshrc (bash users: source ~/.bashrc) or close and reopen Terminal before running claude; otherwise the current terminal does not see the new variables and Claude Code shows the login screen. If the one-click script cannot run, see "Manual Configuration" at the end of this page.
Verify Claude Code Installation
After installation is complete, enter the following command to check if the installation was successful. If the version number is displayed, congratulations! Claude Code has been successfully installed.
claude --version3. Start Using Claude Code
You can now start using Claude Code!
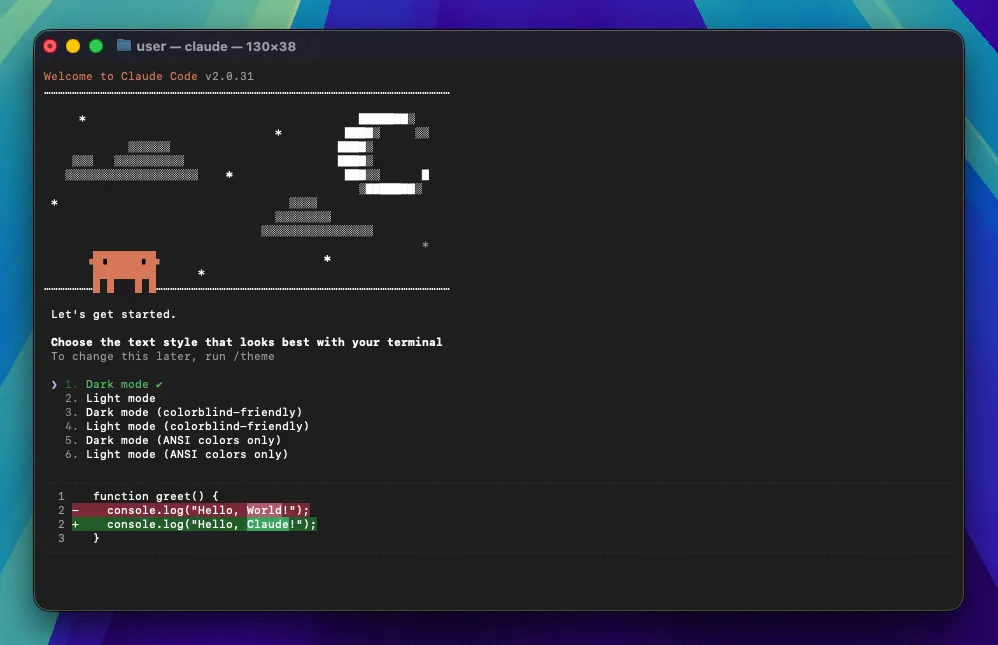
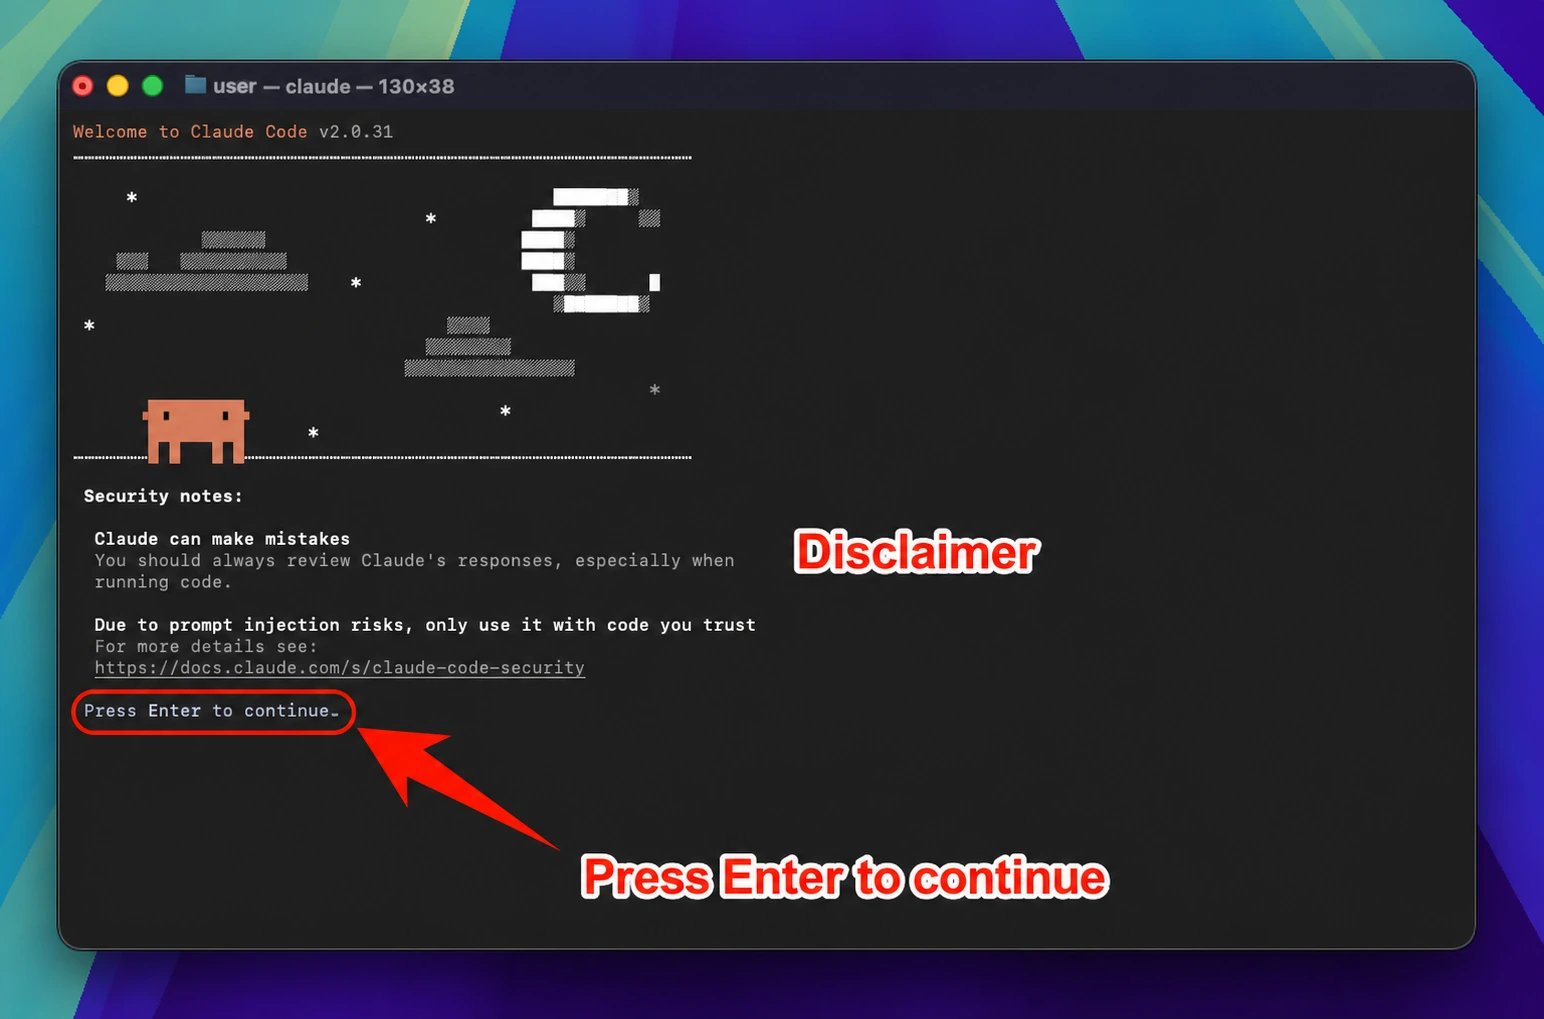
Launch Claude Code
Go to your project directory and run claude:
cd /path/to/your/project
claude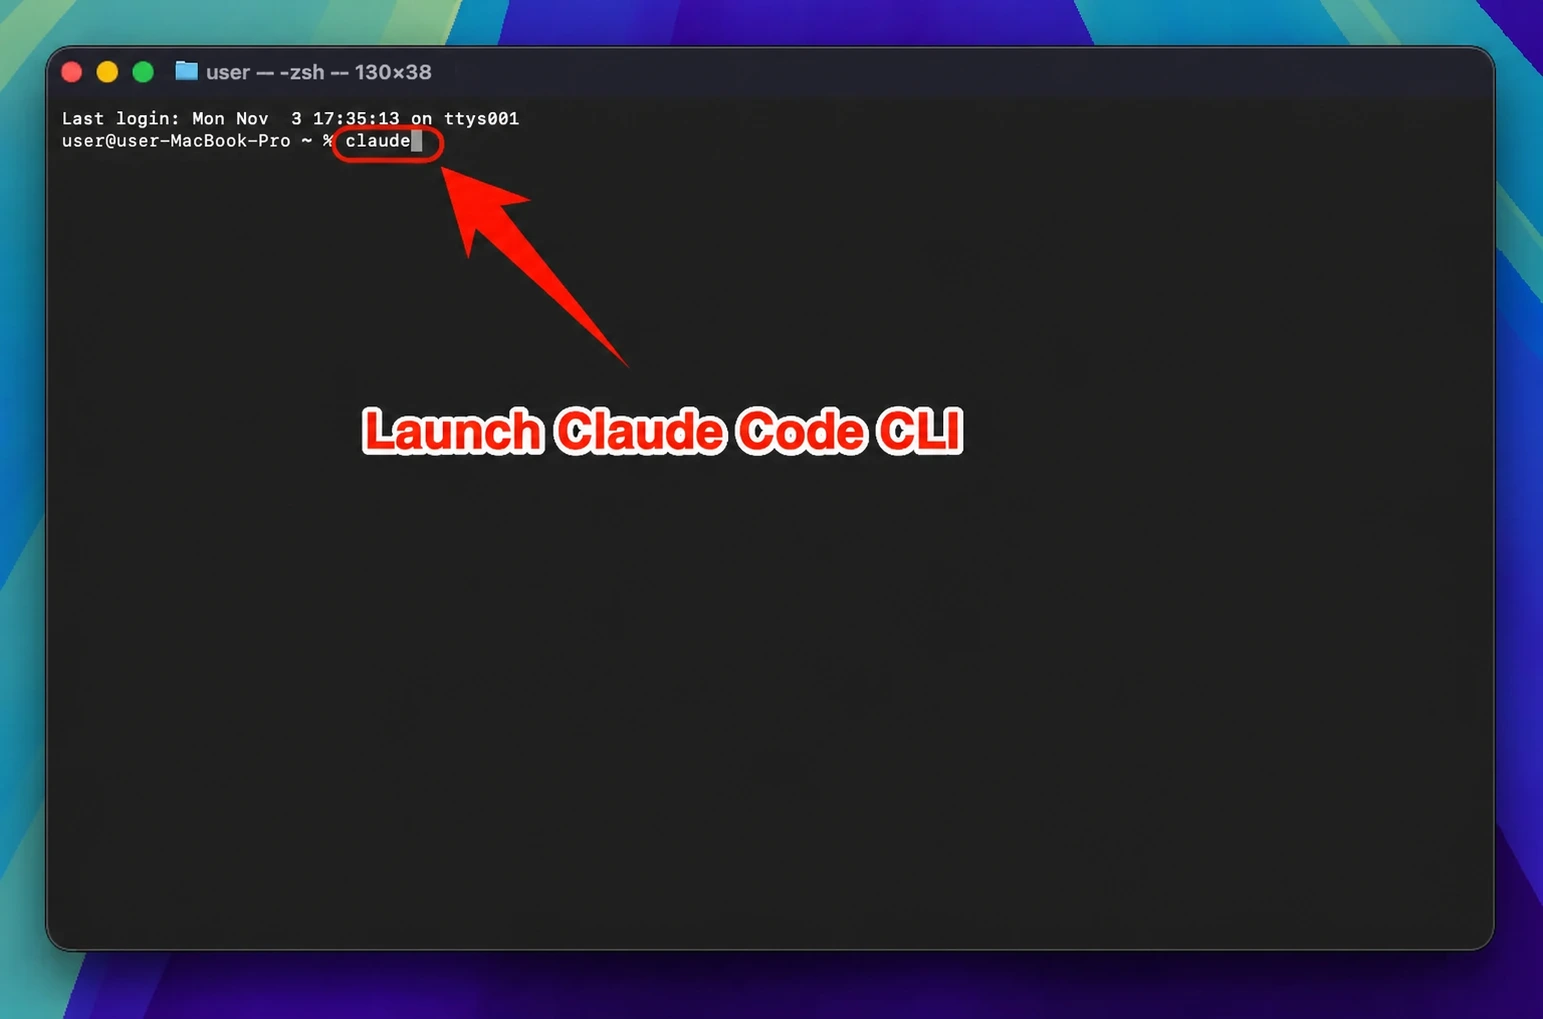
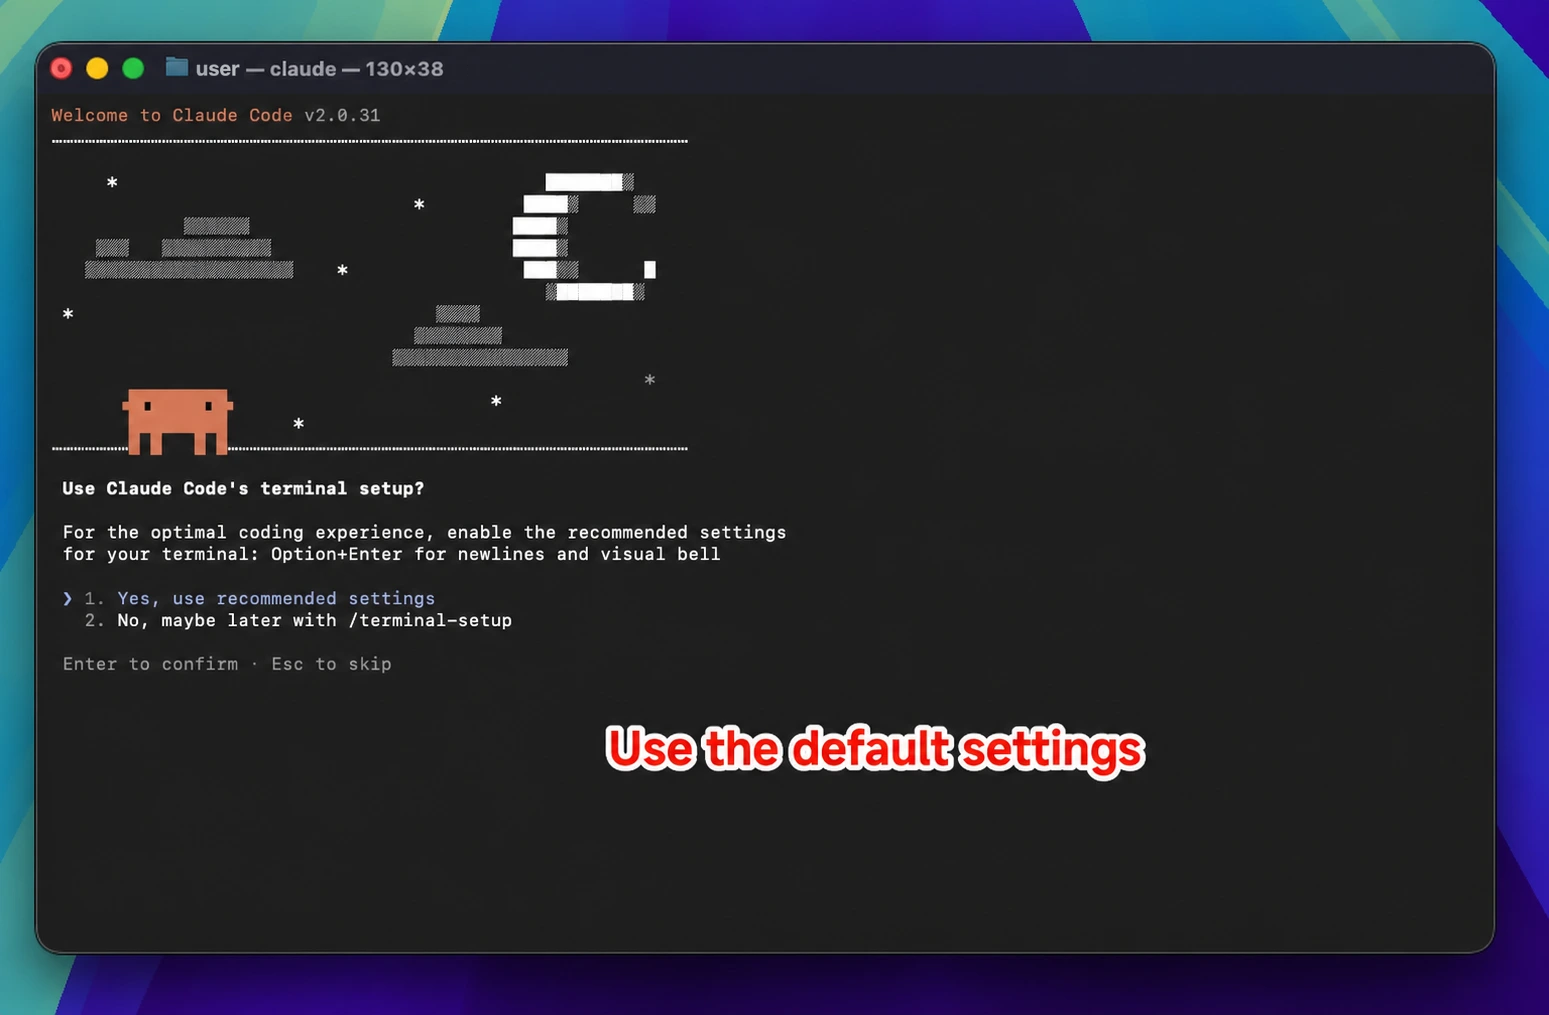
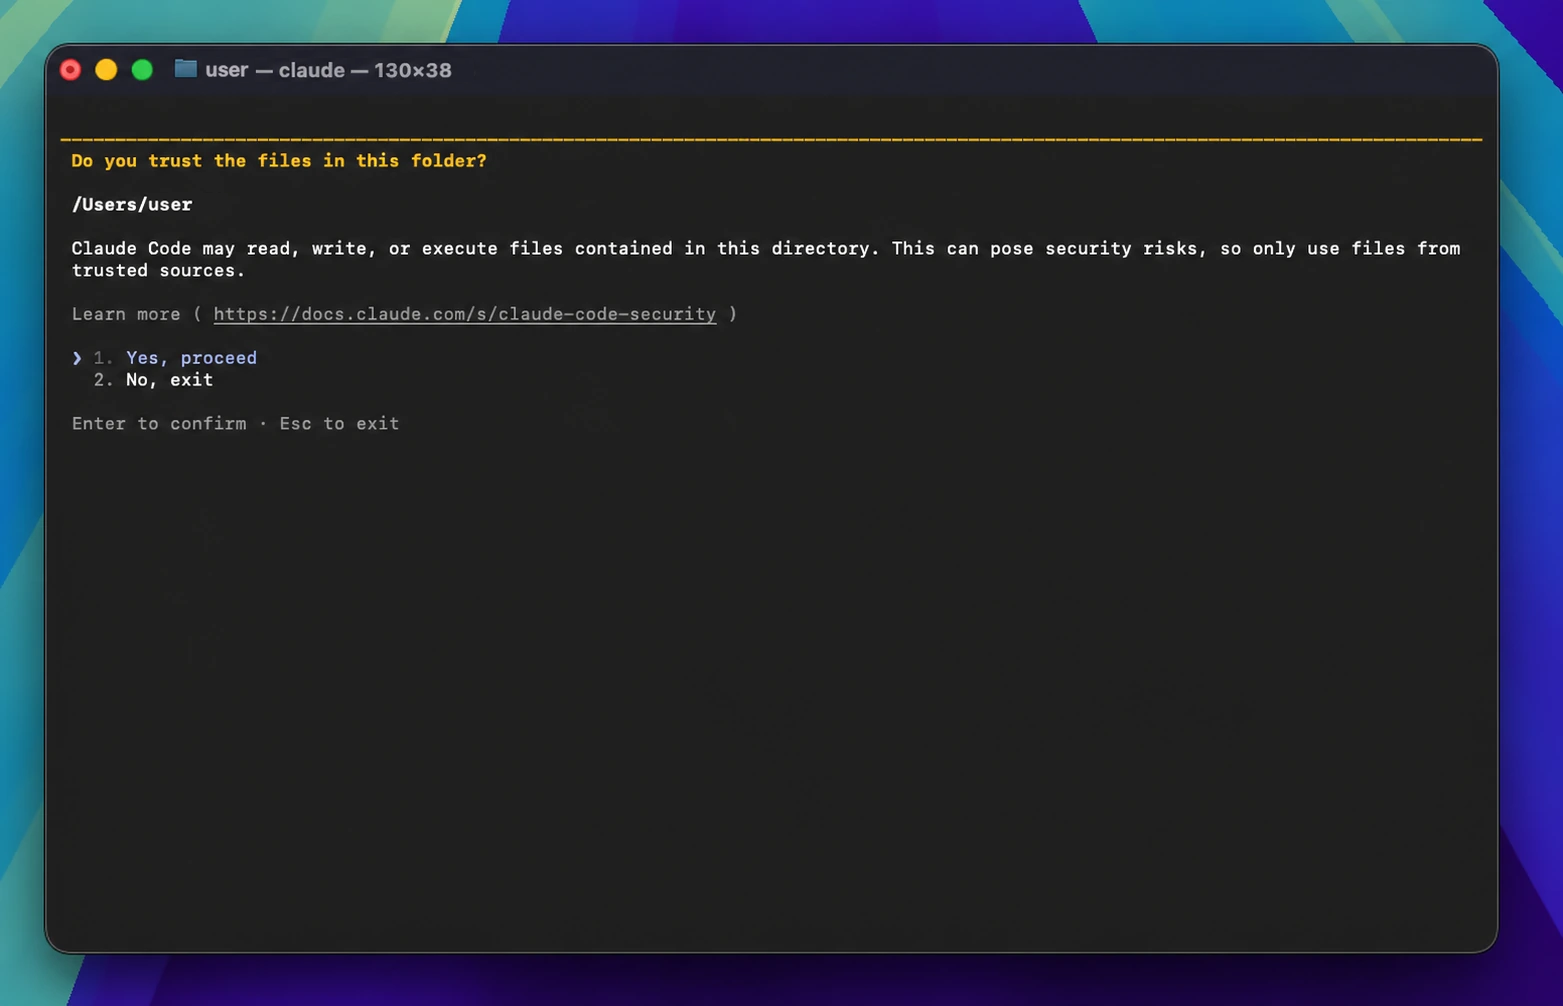
Select Model (Optional)
Enter /model and press Enter to choose a model. The current version's Default (recommended) is Opus 5.5 (claude-opus-5-5); the list also includes Fable 5.1 (claude-fable-5-1), Sonnet 5.5 (claude-sonnet-5-5) and Haiku 5.5 (claude-haiku-5-5). Use the arrow keys to select a model, press Enter to make it the default, or press s to use it for this session only. All of these models are available on 88API (your token group must contain them; see "Which token group to choose" above). The prices shown in the list are Claude's official prices; you are billed at 88API prices.
Note: After setting and modifying the environment variable
ANTHROPIC_BASE_URL, all models used (including official preset models) will call the custom access point and will not consume official account Quota.
4. macOS Common Issues Resolution
macOS says the developer cannot be verified
The official Claude Code binary is signed by Anthropic and notarized by Apple, so it is normally not blocked. If it is still blocked, open "System Settings" → "Privacy & Security" and click "Open Anyway" at the bottom of the page. Do not run sudo spctl --master-disable (it turns off Gatekeeper for the whole system).
Linux Graphical Guide
1. Install Claude Code
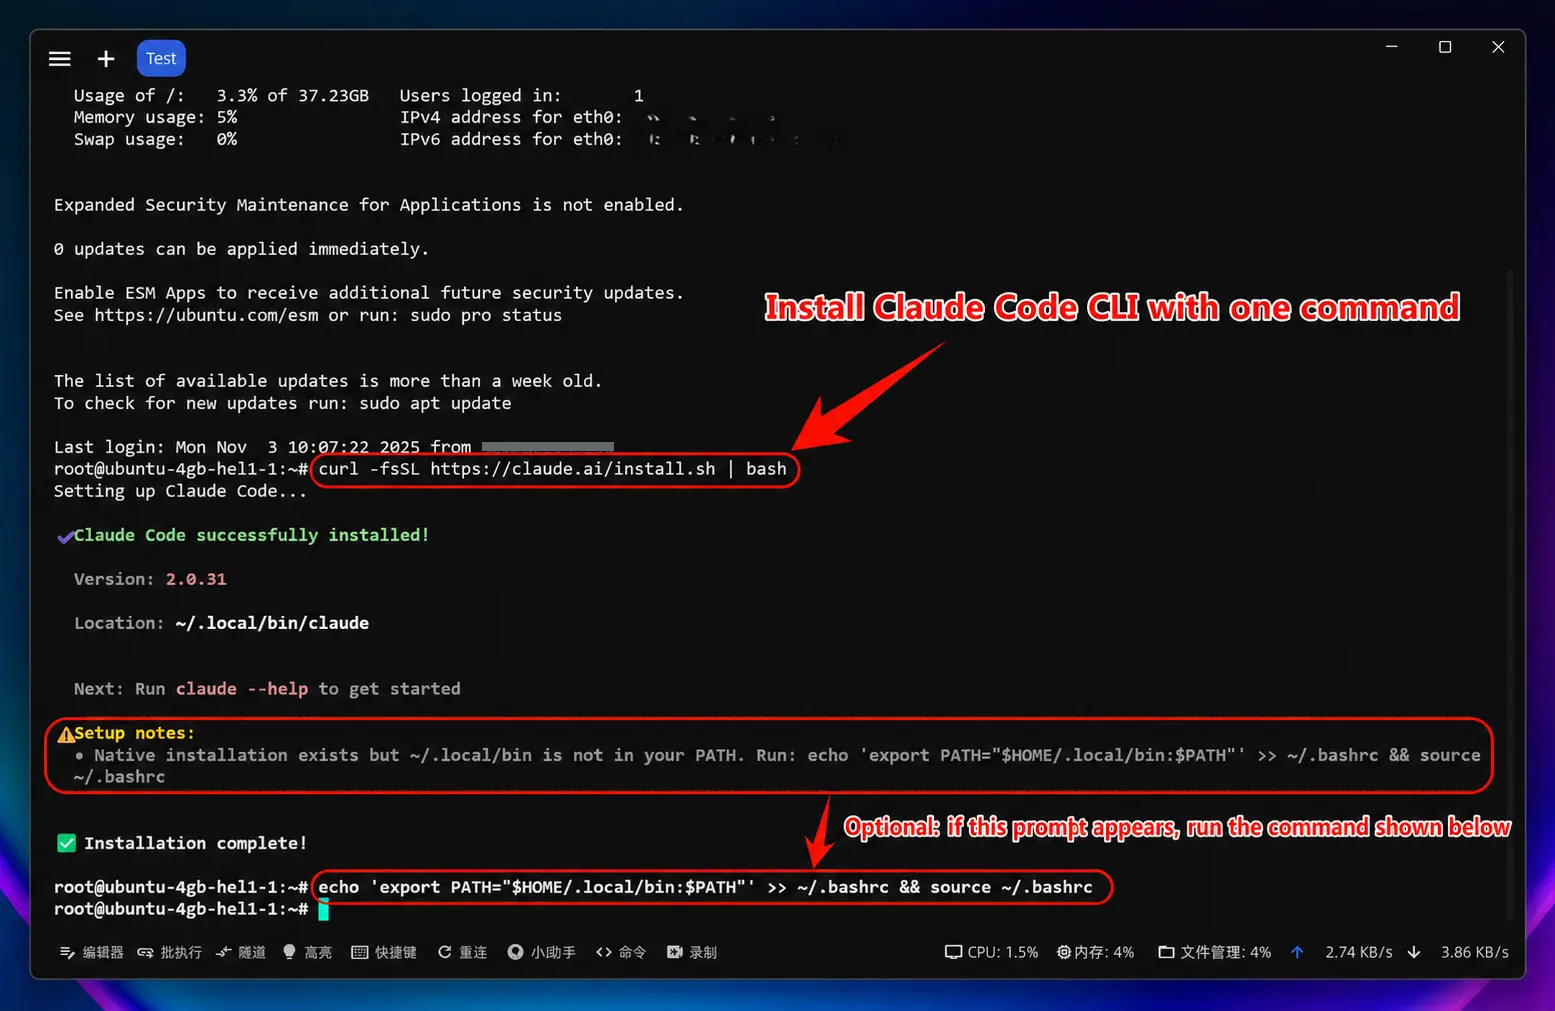
Install Claude Code
Open Terminal and run the command below. No sudo is needed: the installer installs into the current user's ~/.local/bin. For a system-wide installation, use the official apt/dnf/apk repositories (see https://code.claude.com/docs/en/setup).
curl -fsSL https://claude.ai/install.sh | bashIf the installer says that ~/.local/bin is not in your PATH, run the command it prints (bash example):
echo 'export PATH="$HOME/.local/bin:$PATH"' >> ~/.bashrc && source ~/.bashrcVerify Claude Code Installation
After installation is complete, enter the following command to check if the installation was successful. If the version number is displayed, congratulations! Claude Code has been successfully installed.
claude --version2. Set Environment Variables
To connect Claude Code to 88API, you need to set two environment variables (ANTHROPIC_BASE_URL and ANTHROPIC_AUTH_TOKEN):
One-Click Environment Variable Modification
Run the following command in Terminal:
curl -fsSL https://88api.ai/helper/claude-cli-setup.sh | bashDo not add /v1 to the Base URL
When the script asks for the 88API gateway address (prompt: 「请输入 88API 网关地址(不要带 /v1),直接回车使用 https://api.88api.ai」), just press Enter to use the default https://api.88api.ai, then paste the API key you created at https://88api.ai/keys. Claude Code appends /v1/messages itself, so never enter https://api.88api.ai/v1 (that becomes /v1/v1/messages and returns 404 Invalid URL); a trailing / or /v1 typed by mistake is removed by the script automatically.
The script writes export ANTHROPIC_BASE_URL / export ANTHROPIC_AUTH_TOKEN into ~/.bashrc and ~/.zshrc and removes old ANTHROPIC_API_KEY exports there. If ~/.claude/settings.json exists, it is backed up first, then these two env values are updated in it (and ANTHROPIC_API_KEY / CLAUDE_CODE_SIMPLE are removed).
The script's prompts are in Chinese; the values are the same as in the text.
When the script finishes, run source ~/.bashrc (zsh users: source ~/.zshrc) or close and reopen the terminal before running claude; otherwise the current terminal does not see the new variables and Claude Code shows the login screen. If the one-click script cannot run, see "Manual Configuration" at the end of this page.
3. Start Using Claude Code
You can now start using Claude Code!
Launch Claude Code
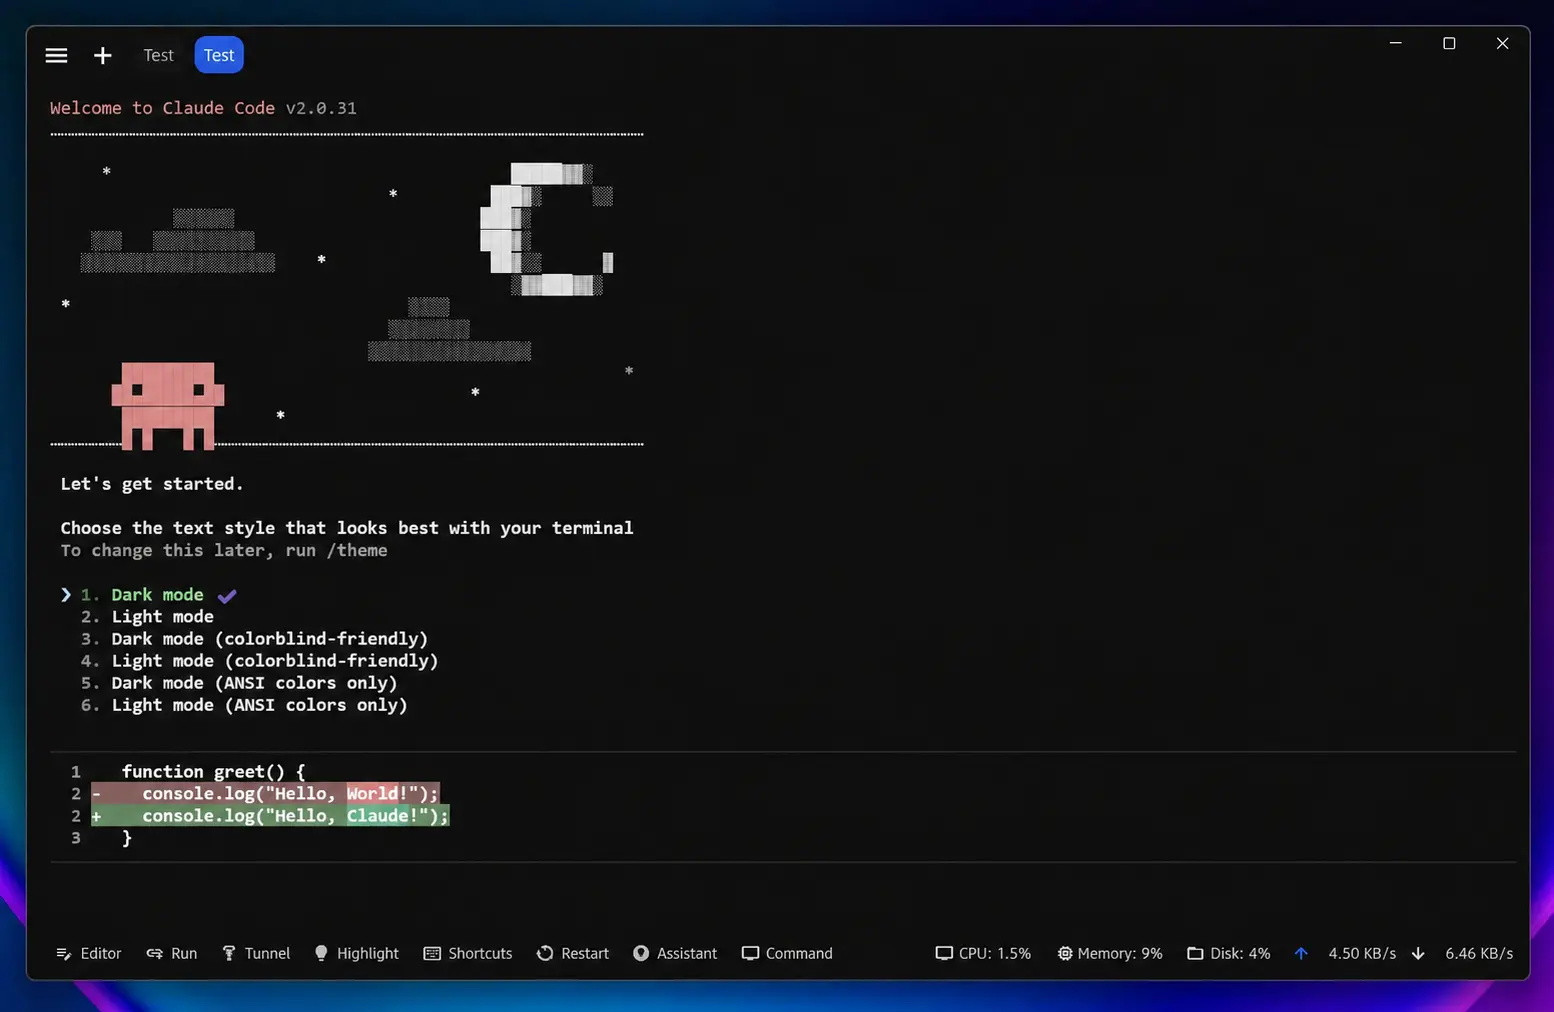
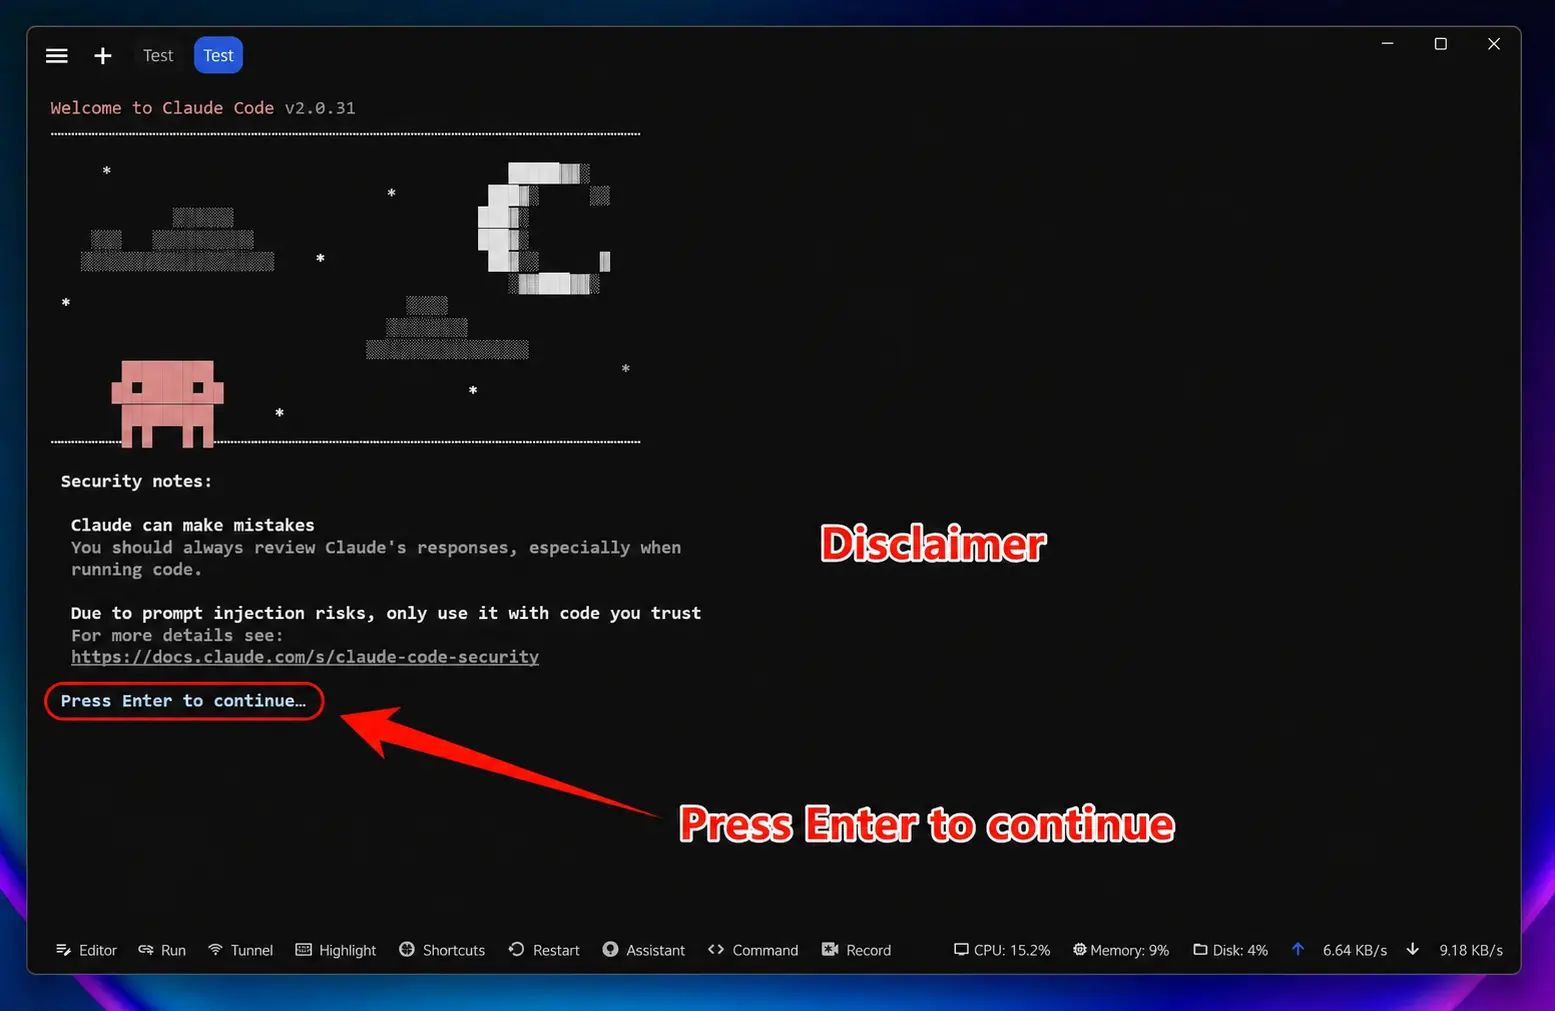
Go to your project directory and run claude:
cd /path/to/your/project
claude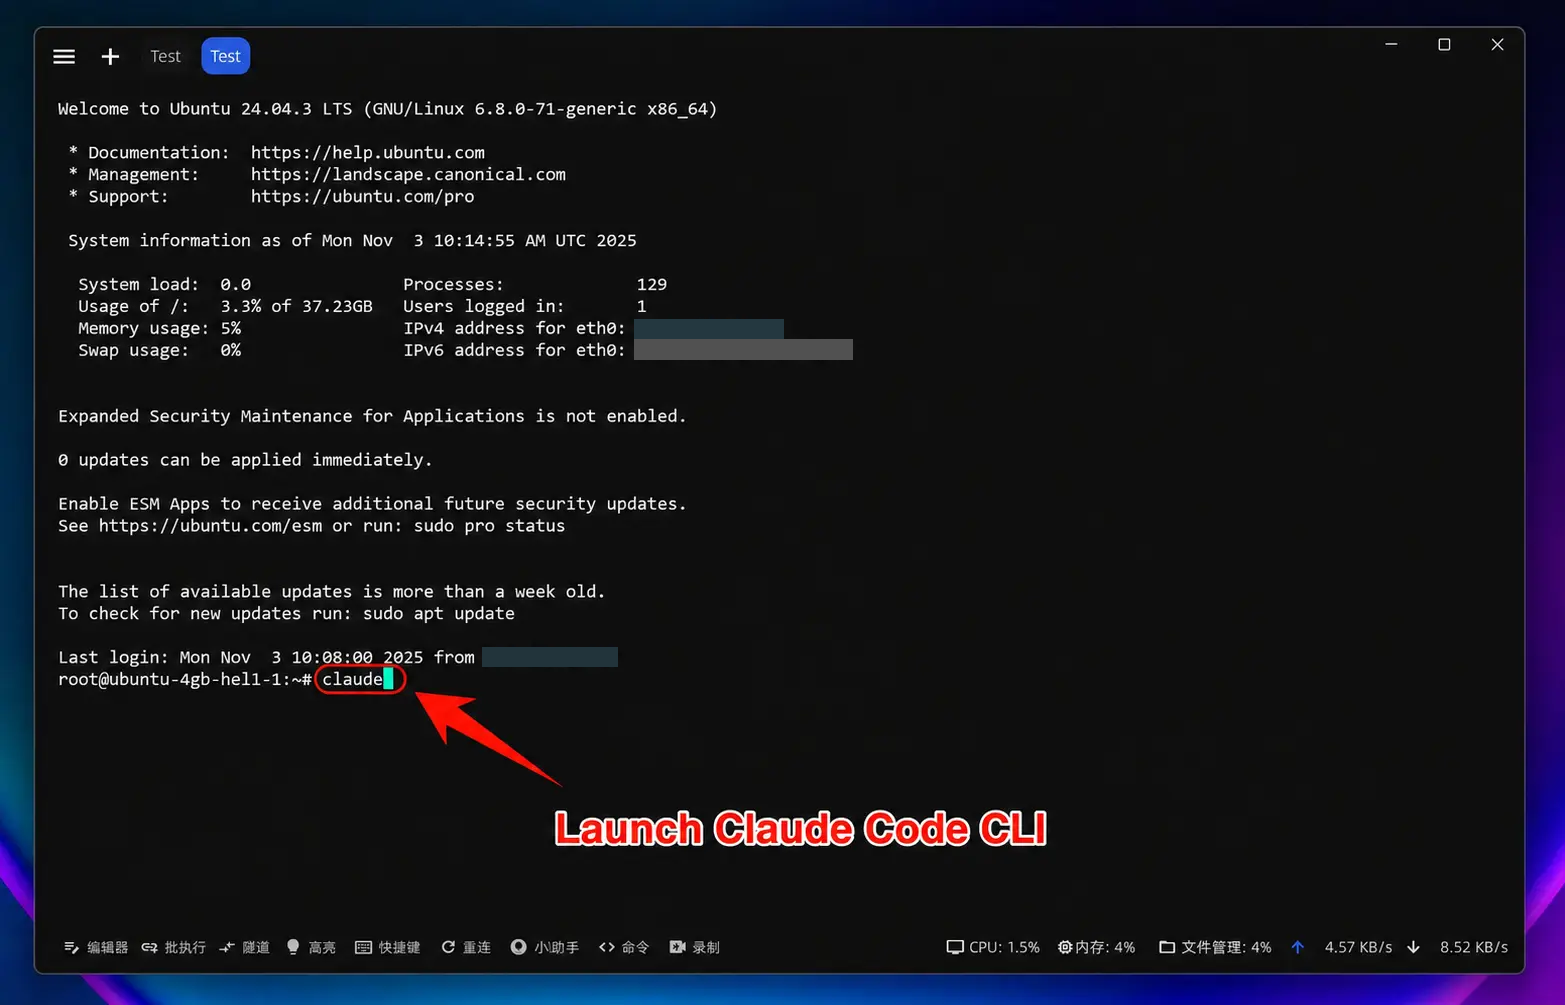
Select Model
Enter /model and press Enter to choose a model. The current version's Default (recommended) is Opus 5.5 (claude-opus-5-5); the list also includes Fable 5.1 (claude-fable-5-1), Sonnet 5.5 (claude-sonnet-5-5) and Haiku 5.5 (claude-haiku-5-5). Use the arrow keys to select a model, press Enter to make it the default, or press s to use it for this session only. All of these models are available on 88API (your token group must contain them; see "Which token group to choose" above). The prices shown in the list are Claude's official prices; you are billed at 88API prices.
Note: After setting and modifying the environment variable
ANTHROPIC_BASE_URL, all models used (including official preset models) will call the custom access point and will not consume official account Quota.
4. Linux Common Issues Resolution
Missing Dependency Libraries
Some Linux distributions require the installation of additional dependencies:
# Ubuntu/Debian
sudo apt install build-essential
# CentOS/RHEL
sudo dnf groupinstall "Development Tools"
Environment Variables Not Taking Effect
Check the following points:
- Confirm that the correct configuration file (
.bashrcor.zshrc) was modified - Restart the terminal or run
source ~/.bashrc - Verify settings:
echo $ANTHROPIC_BASE_URLshould printhttps://api.88api.ai - In Claude Code, enter
/statusand check that the Anthropic base URL line showshttps://api.88api.ai
Manual Configuration (when the one-click script cannot run)
Edit the Claude Code user settings file (Windows: %USERPROFILE%\.claude\settings.json; macOS / Linux: ~/.claude/settings.json; create it if it does not exist) and add:
{
  "env": {
    "ANTHROPIC_BASE_URL": "https://api.88api.ai",
    "ANTHROPIC_AUTH_TOKEN": "sk-your-88API-token"
  }
}- Do not add
/v1toANTHROPIC_BASE_URL: Claude Code requests/v1/messagesitself, so.../v1becomes/v1/v1/messagesand returns 404. - Do not also set
ANTHROPIC_API_KEY: 88API reads the x-api-key header it produces first, so an old key causes 401 errors. - Values in settings.json take precedence over terminal environment variables.
- Save the file, run claude again, enter
/statusand check that the Anthropic base URL line showshttps://api.88api.ai.
VS Code Extension
The Claude Code extension for VS Code does not read ~/.claude/settings.json for its own login check. Open your VS Code user settings JSON (Command Palette: Preferences: Open User Settings (JSON)), add the following, then restart VS Code:
"claudeCode.environmentVariables": [
  { "name": "ANTHROPIC_BASE_URL", "value": "https://api.88api.ai" },
  { "name": "ANTHROPIC_AUTH_TOKEN", "value": "sk-your-88API-token" }
]